
This blog is a quick guide on how we can use BAM with Power Automate.
- Setup the BAM connector
- Add your SL360 BAM key
- Use the connector in your Flow
Getting the Connector
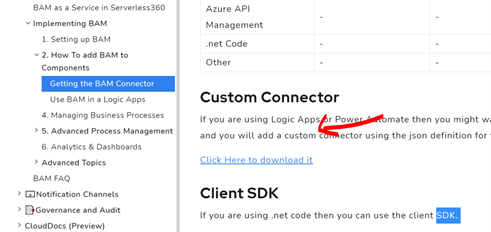
To start with, we need to get the BAM connector. The below link in the documentation contains information about the connector and other options to connect to BAM. In this case, we will be setting up a custom connector for your BAM instance.
Download the JSON for the connector from this link here
Once I have downloaded the connector, I must import it into Power Automate. On your Power Automate environment page go to the Data and then Custom Connectors menu as shown below.
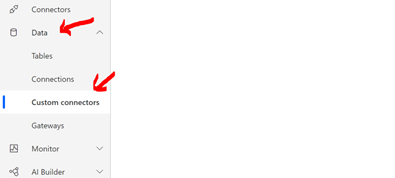
Click the New Custom Connector Button and Import an Open API from File, and then choose the file you downloaded
You will need to give the connector a name and then click Continue.
Next, you need to get the host for your BAM API, which will support you using the SaaS or Private hosting version of Turbo360 BAM. To get this, you must go to the Turbo360 settings section and then the Access Keys and BAM Connection info.
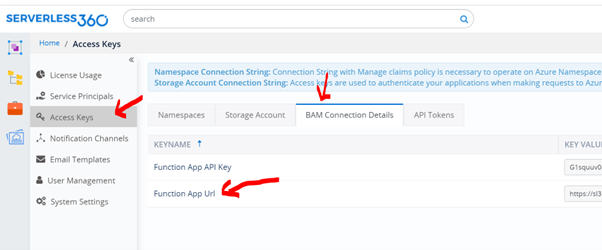
It would help if you had the Function App URL. Copy the URL and go back to the connector.
Paste the URL in the hostname and paste it into the configuration screen for the connector.
Point to Note:
You need to make sure the https:// is removed when pasting the hostname
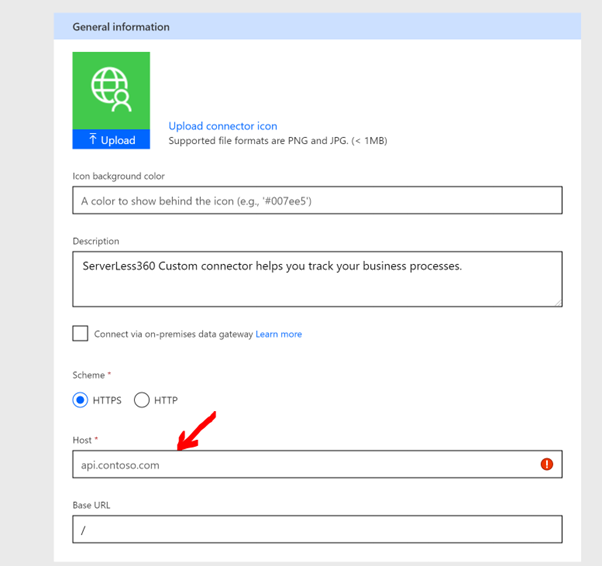
Then click the Next button at the bottom, and you will move to the Security screen.
You can now click Next on the security screen and keep the defaults.
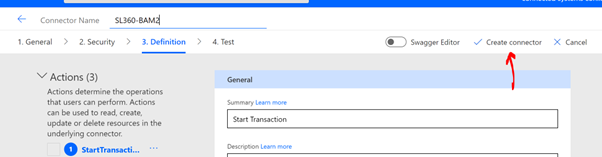
On the definition screen, you can click Create Connector at the top. You won’t need to modify any information on this screen.
Power Automate will now take a few seconds while it sets up your connector. Once it’s complete, you can click to close the connector.
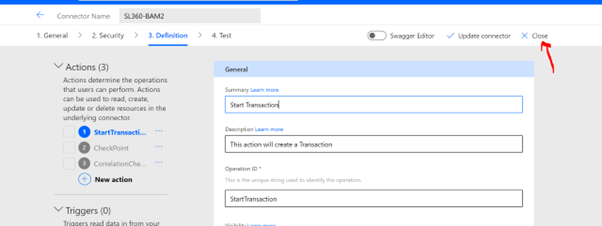
You will see your BAM connector listed and be able to use it in your Flows.
Create a BAM Process
Next, we need to create a BAM business process in Flow. The below short video will show you how to do this.
It was just a simple Business Process and transaction for this demo. In the real world, your Flow would represent your real business process.
Create a Flow and Add BAM Shapes
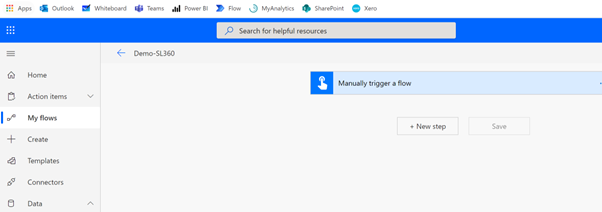
In Power Automate, I have created a new Flow and will trigger it with the Flow Button trigger.
Next, I will add the action for the SL360 connector. I will add an action and provide the name I gave my BAM connector earlier.
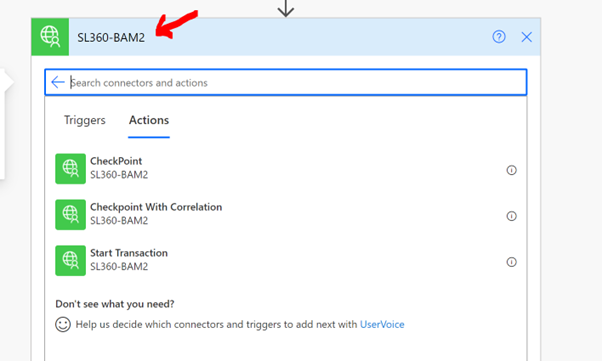
I will then see the 3 Turbo360 BAM actions. I will, in most cases, use Start Transaction and then CheckPoint for subsequent milestones. I can use CheckPoint with Correlation for more advanced scenarios.
We will start by choosing Start Transaction.
When you choose the action, you will be asked to add some info for your connector, as shown below.
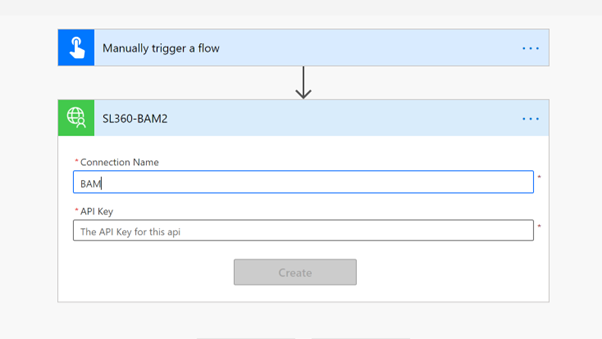
First, give the connector instance a name such as BAM.
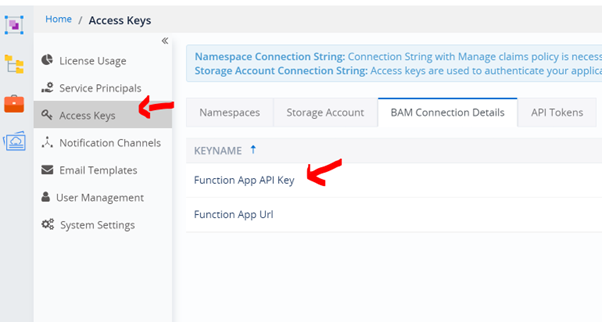
Next, you need the API key for your BAM instance, which is available in the Turbo360 Portal.
Next, we need to supply the details for the Start Transaction action. The below picture shows them configured.
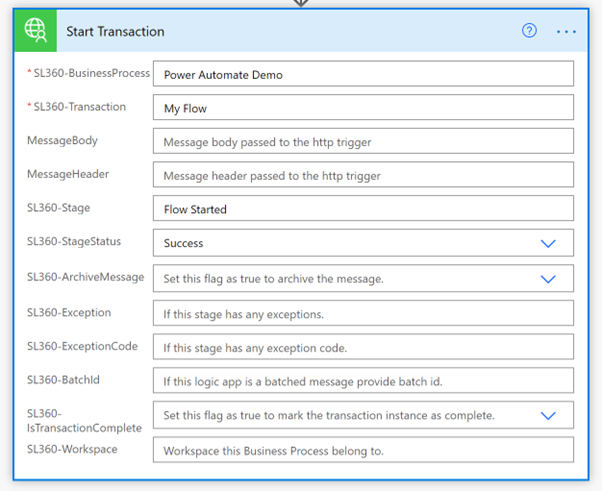
I need as a minimum:
- Business Process Name
- Transaction Name
- Stage Name
- Stage Status
The Business Process Name, Transaction Name, and Stage Name will all match the values set up in your Business Process you created in BAM earlier and as shown below.
After the start transaction, I added a delay shape to simulate some work done in the Flow. I will then add a Checkpoint action. In the Check Point, I will set the transaction instance id to be the value returned from my Start Transaction shape so that the checkpoint knows which event it matches. I will also supply the name of the 2nd milestone in the business process transaction (in my case, Flow Complete) and indicate the checkpoint is successful. It will also suggest that the Transaction is Complete, as shown below.
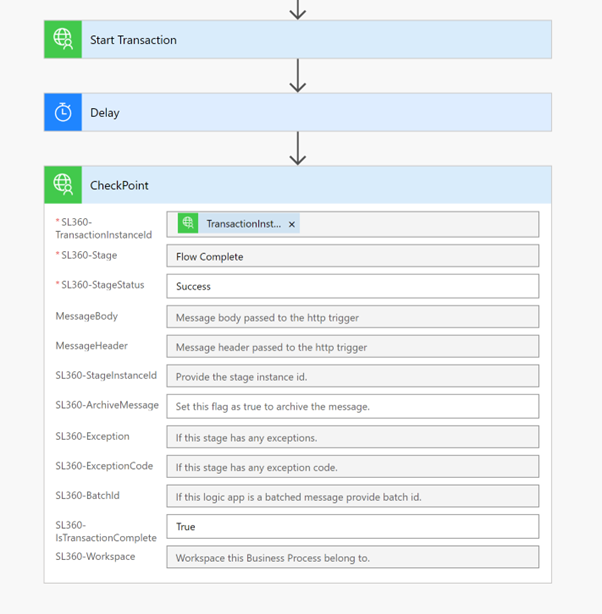
That’s the configuration set, and we can now try out our Flow.
Testing the Flow with BAM
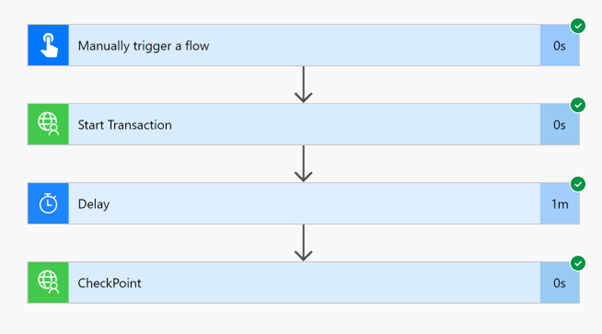
If I now run the Flow with the Test Flow feature, it will run, and I will be able to see it has been completed after the delay passes.
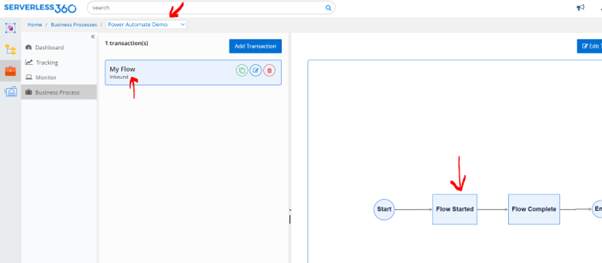
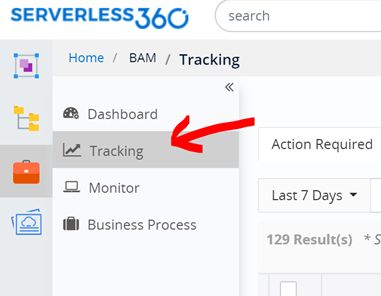
I can now go to Turbo360, the BAM area, and the Tracking menu.
I can now search for my transactions, and if I see below, my transaction ran, and the green indicator indicates that it has been completed successfully.
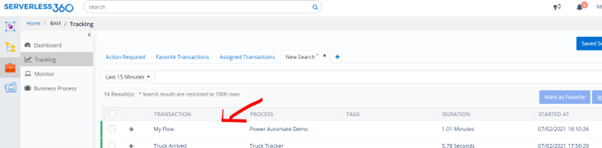
I can click on it, open its details, and see how the transaction ran.
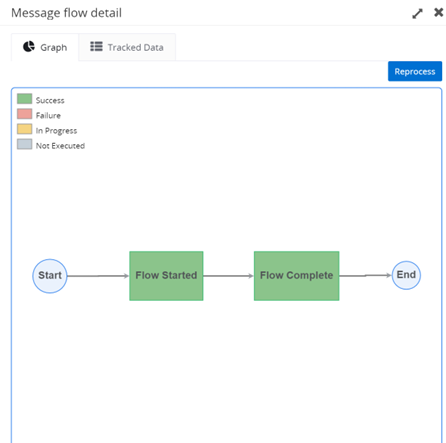
Congratulations, you now have Turbo360 BAM running with Power Automate.
Summary
Hopefully, this walk-through showed that adding BAM to Power Automate was simple. You now have access to all of the same features that Logic App users benefit from with BAM. You do some of the following fantastic things:
- Enrich your tracking with custom properties that users can search on in BAM
- Create rich dashboards based on BAM metrics
- Add property promotion from headers or message bodies
Power Automate is an excellent tool for Citizen Development, Departmental solutions, Embedded Automation within departments or applications, and personal productivity. Power Automate still needs to be built by someone with good technical skills. By using BAM, you can now let business users self-service on a simplified view of your solution so they can track what’s happening, troubleshoot business issues, and answer their questions.
Business Self Service will help your Power Automate solutions provide even more value to the business user.