
There is no doubt that organizations have a difficult task to address the current requirements for building and managing APIs, especially if they don’t use tools like API Management. APIs require up-to-date and strong documentation, increased security levels, comprehensive testing, routine versioning, and high-reliability to be appropriately utilized.
Today we will continue to address how you can easily document your API operations without requiring the traditional Word/PDF documents that can quickly become deprecated and obsolete. In the previous post, we address:
- The global API Description and Tags
- And the API Operation Description and Tags
- And Operation Headers
In this blog post, we will be addressing Requests and Responses.
Operation Requests
There isn’t any doubt in my mind that one of the most essential tasks while documenting your APIs is to provide sample requests. These requests samples usually don’t show all possible parameter configurations, but it should be as rich as possible with parameters. And if possible, you should provide different samples according to different scenarios if this applies to your operation.
By default, while we expose the first Logic App using the APIM wizard, only the schema normally available on the When a HTTP request is received trigger of the Request connector, if available because this information is not mandatory.
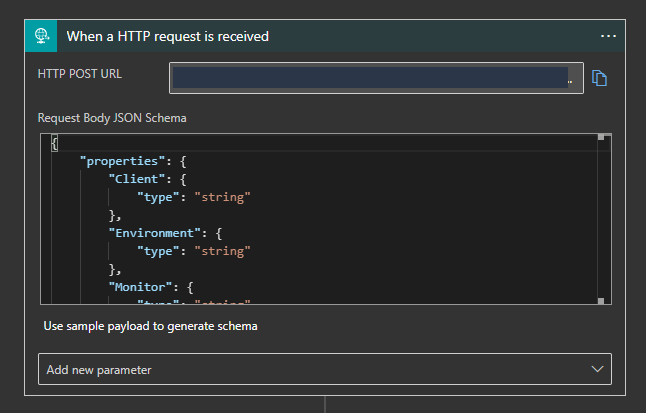
This situation is better than nothing, but it is not the ideal scenario, and it can be improved significantly.
To improve this experience and empower our APIs with better documentation, we need to:
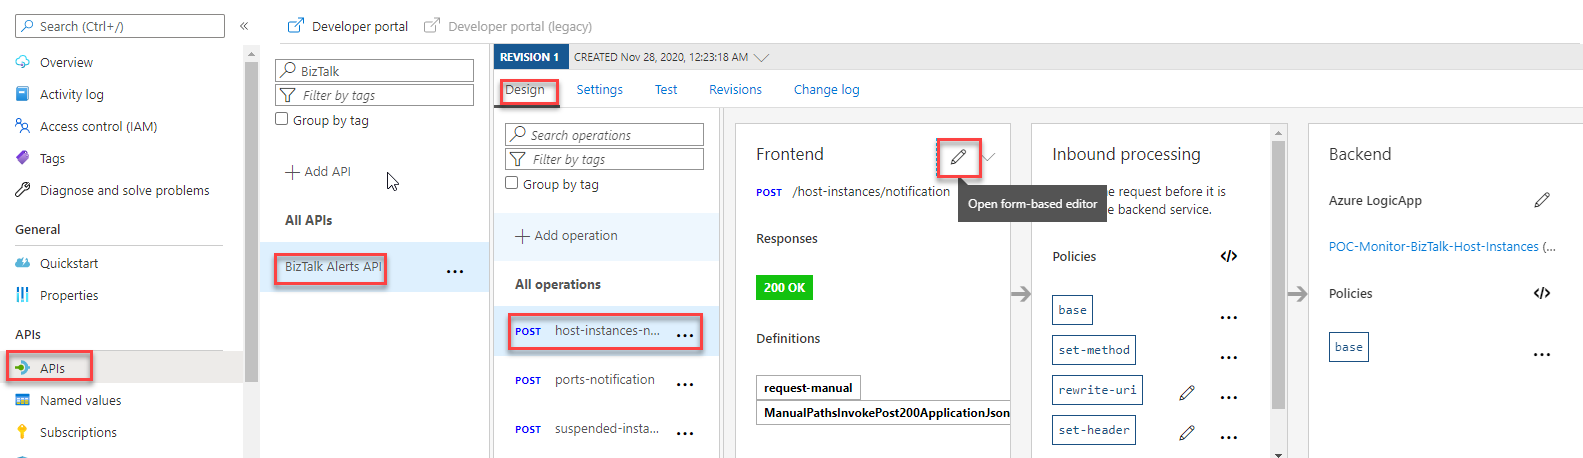
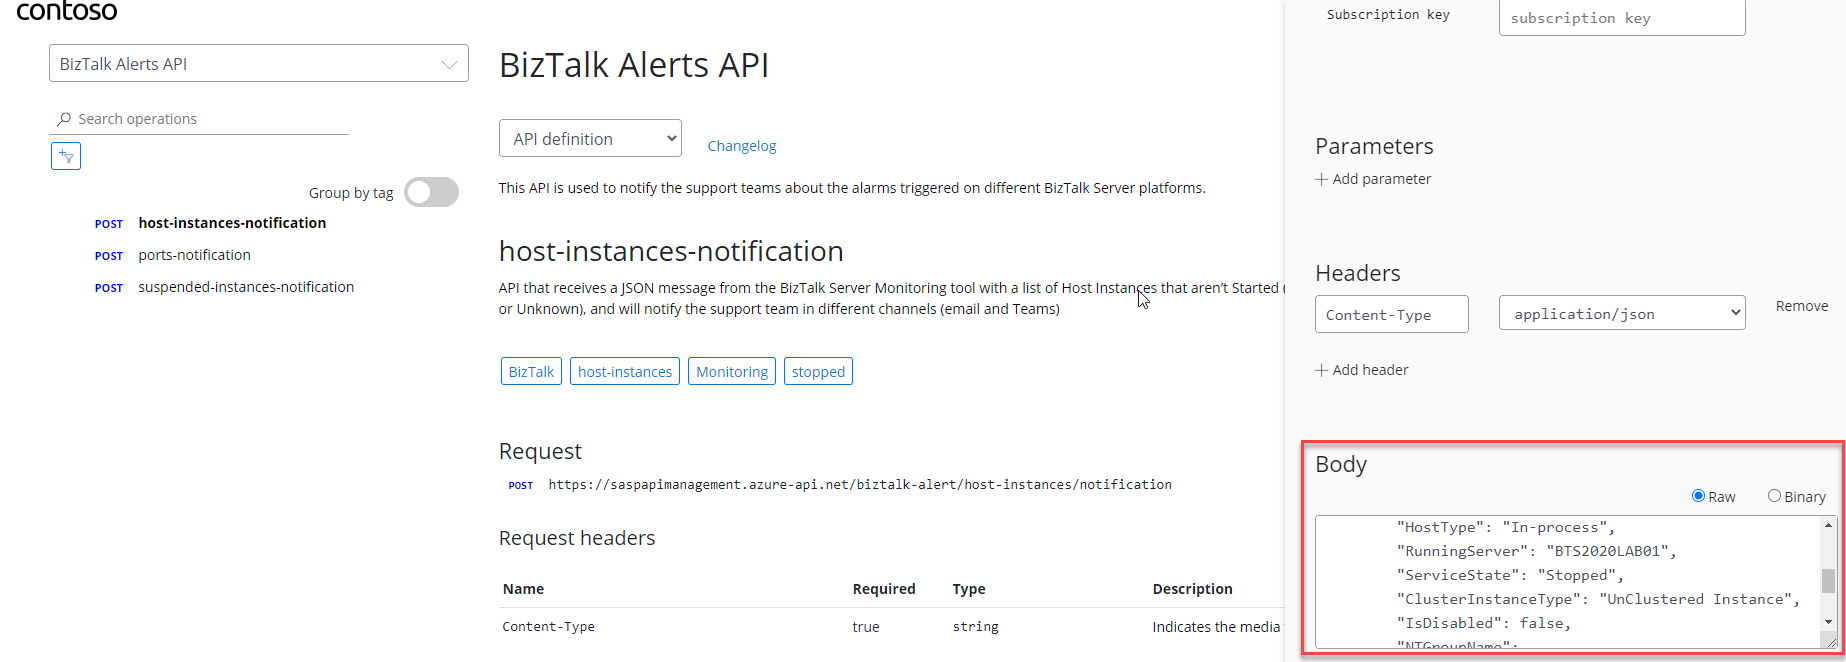
- Access to your APIM on the Azure Portal.
- And on the left menu, under the APIs section, click the APIs option.
- Select the API, in this case, BizTalk Alerts API, and on the Design panel select your operation, let’s start to select the first one host-instances-notification and then click Open form-based editor to edit the Frontend settings.
- On the Frontend panel, select the Request tab
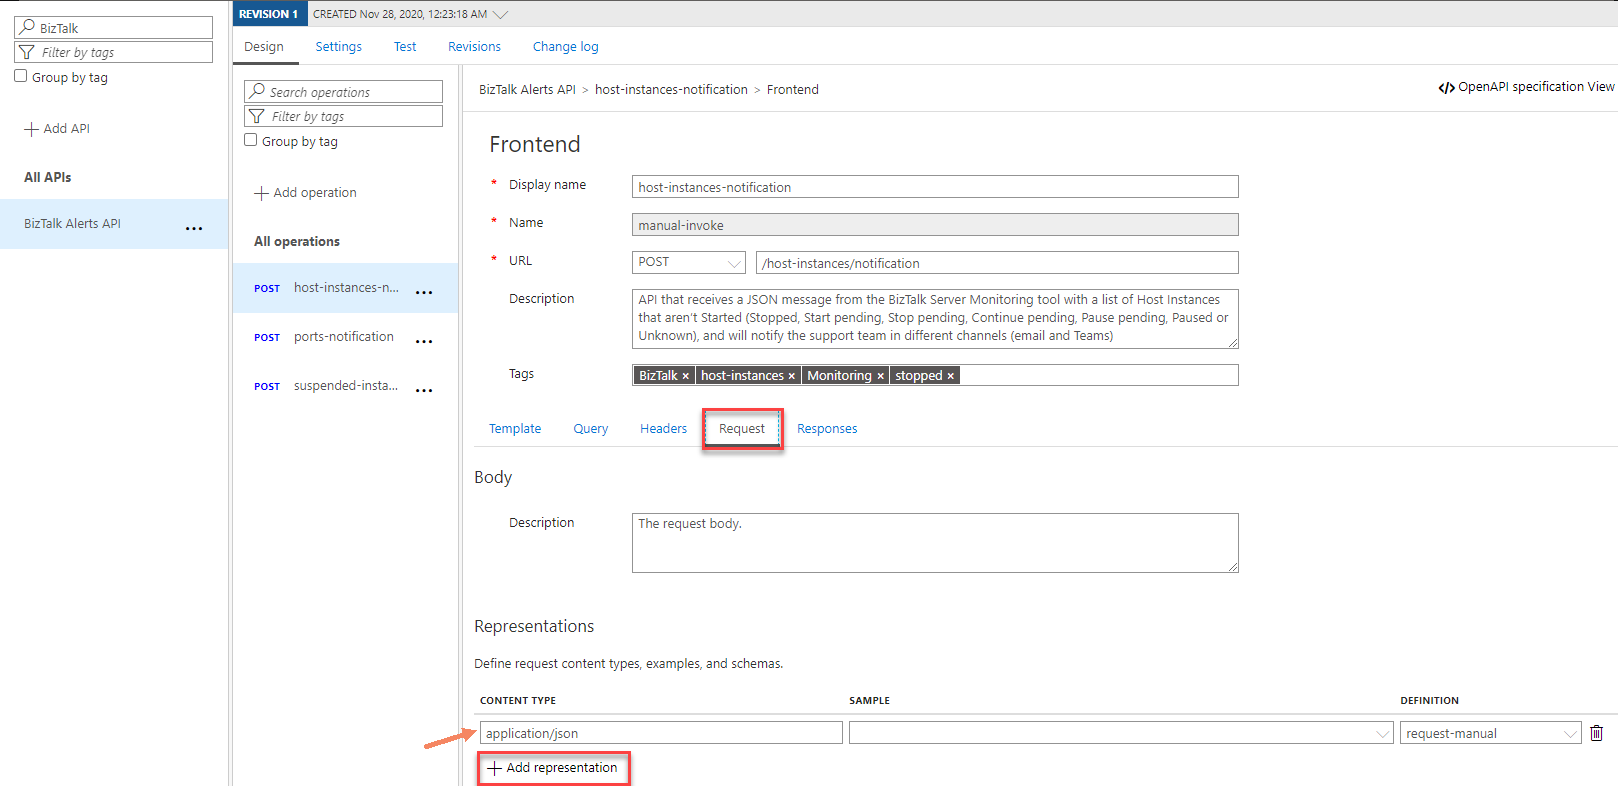
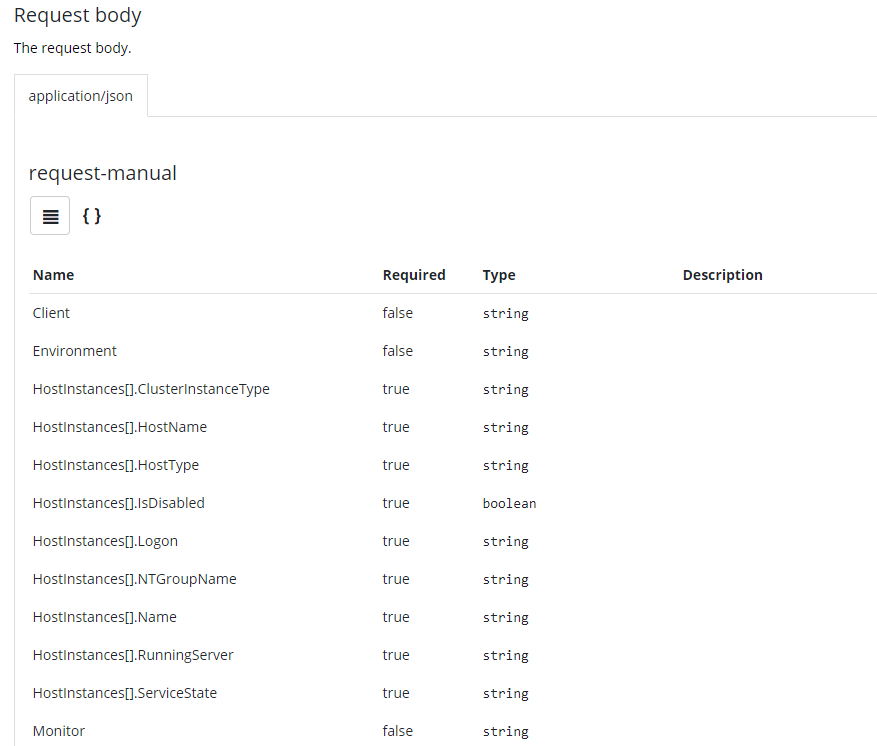
Note: We already have a request representation for this operation containing the schema representation of the Logic App. We can remove and add a new representation or modify the existing one. For simplicity, we will be deleting the existing one and create a new representation.
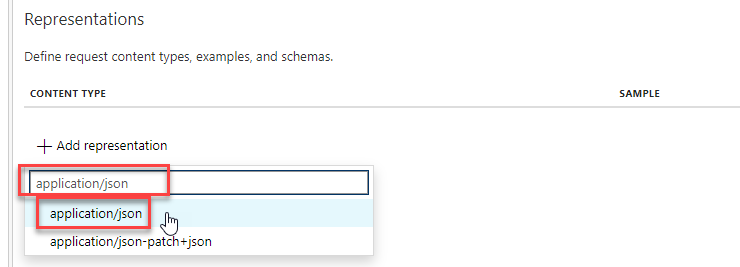
- On the Representation table delete the existing representation and then click +Add representation. On the text box type, application/json and select the application/json option from the list.
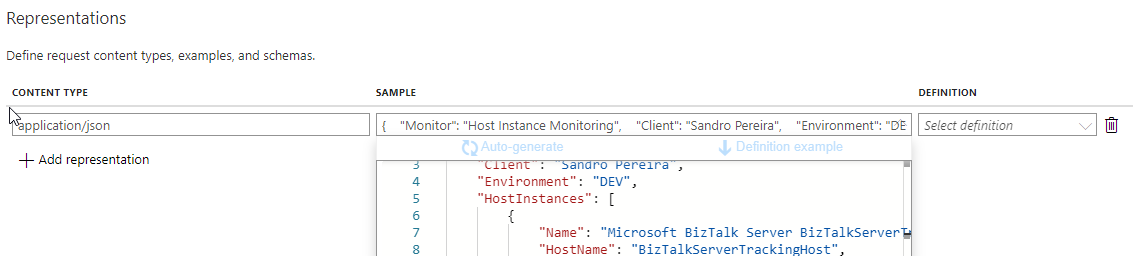
- Now from the table, we will see that already have a Content Type setup has application/json now we need to perform the following tasks:
- On the Sample property provide a sample of the JSON request
-
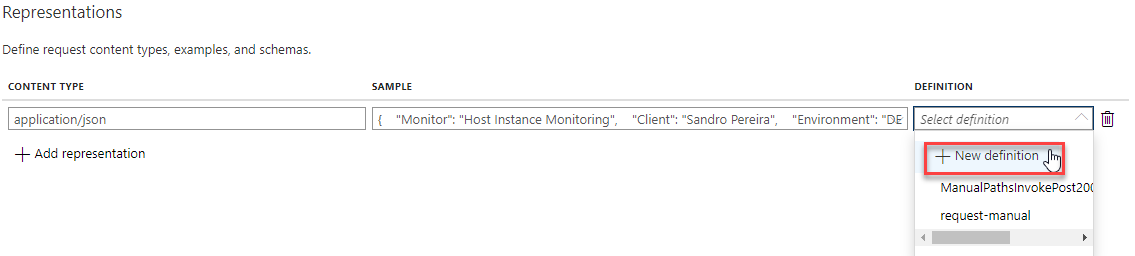
- On the Definition, select + New definition
-
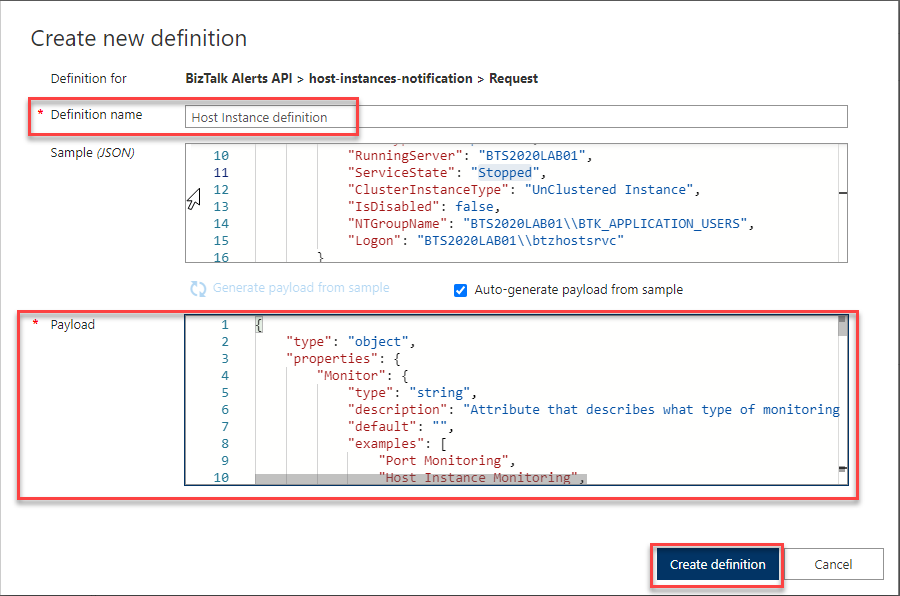
- On the Create new definition panel, you will notice that based on the Sample (JSON) that we provide earlier, it already generated a Payload, i.e., a JSON schema. It is a good start but it still needs to be improved for a better documenting experience.
- Copy that Payload to an external editor of your choice, like Notepad++ or Visual Studio Code and for each field add a definition property describing the goal of that specific field.
- Additional you can also add the following properties: default and examples
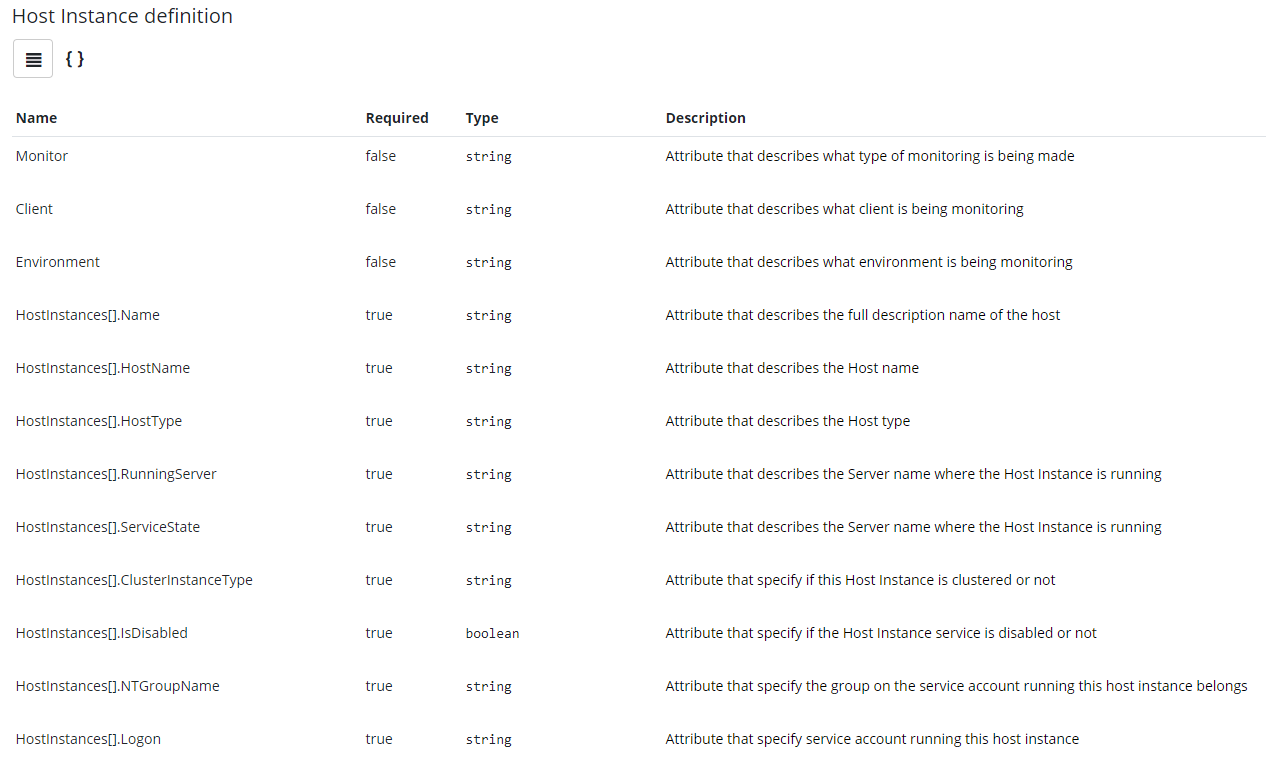
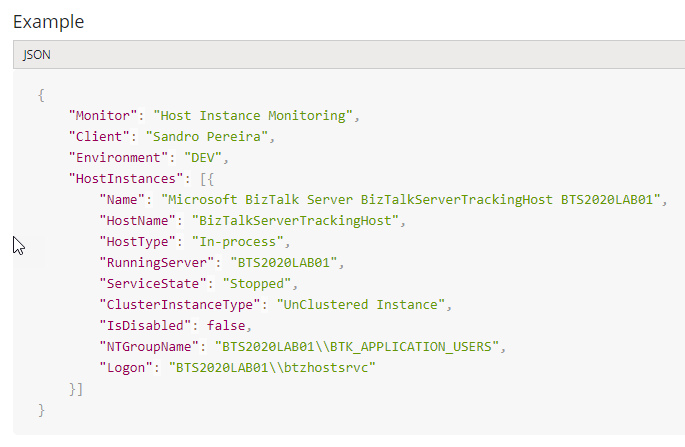
- Add the below sample, provide a Definition Name like Host Instance definition, and select Create definition.
- On the Create new definition panel, you will notice that based on the Sample (JSON) that we provide earlier, it already generated a Payload, i.e., a JSON schema. It is a good start but it still needs to be improved for a better documenting experience.
{
    "type": "object",
    "properties": {
        "Monitor": {
            "type": "string",
            "description": "Attribute that describes what type of monitoring is being made",
            "default": "",
            "examples": [
                "Port Monitoring",
                "Host Instance Monitoring",
                "Orchestration Monitoring"
            ]
        },
        "Client": {
            "type": "string",
            "description": "Attribute that describes what client is being monitoring",
            "default": "",
            "examples": [
                "Sandro Pereira",
                "Client A",
                "Client B"
            ]
        },
        "Environment": {
            "type": "string",
            "description": "Attribute that describes what environment is being monitoring",
            "default": "",
            "examples": [
                "DEV",
                "QA",
                "PRD"
            ]
        },
        "HostInstances": {
            "type": "array",
            "items": {
                "type": "object",
                "properties": {
                    "Name": {
                        "type": "string",
                        "description": "Attribute that describes the full description name of the host"
                    },
                    "HostName": {
                        "type": "string",
                        "description": "Attribute that describes the Host name"
                    },
                    "HostType": {
                        "type": "string",
                        "description": "Attribute that describes the Host type",
                        "default": "",
                        "examples": [
                            "in-progress"
                        ]
                    },
                    "RunningServer": {
                        "type": "string",
                        "description": "Attribute that describes the Server name where the Host Instance is running"
                    },
                    "ServiceState": {
                        "type": "string",
                        "description": "Attribute that describes the Server name where the Host Instance is running",
                        "default": "",
                        "examples": [
                            "Stopped"
                        ]
                    },
                    "ClusterInstanceType": {
                        "type": "string",
                        "description": "Attribute that specify if this Host Instance is clustered or not"
                    },
                    "IsDisabled": {
                        "type": "boolean",
                        "description": "Attribute that specify if the Host Instance service is disabled or not"
                    },
                    "NTGroupName": {
                        "type": "string",
                        "description": "Attribute that specify the group on the service account running this host instance belongs"
                    },
                    "Logon": {
                        "type": "string",
                        "description": "Attribute that specify service account running this host instance"
                    }
                },
                "required": [
                    "Name",
                    "HostName",
                    "HostType",
                    "RunningServer",
                    "ServiceState",
                    "ClusterInstanceType",
                    "IsDisabled",
                    "NTGroupName",
                    "Logon"
                ]
            }
        }
    }
}
- And then click Save.
- Do the same for the other two operations.
Once again, anyone who enters on the developer portal, a new partner, a new developer, etc., knows exactly what type of request should be passed, what the goals of each field of the request and most importantly it has a sample request available for them to try it, these of each operation.
And if you try the operation directly from the Developer Portal, the request sample will be automatically added.
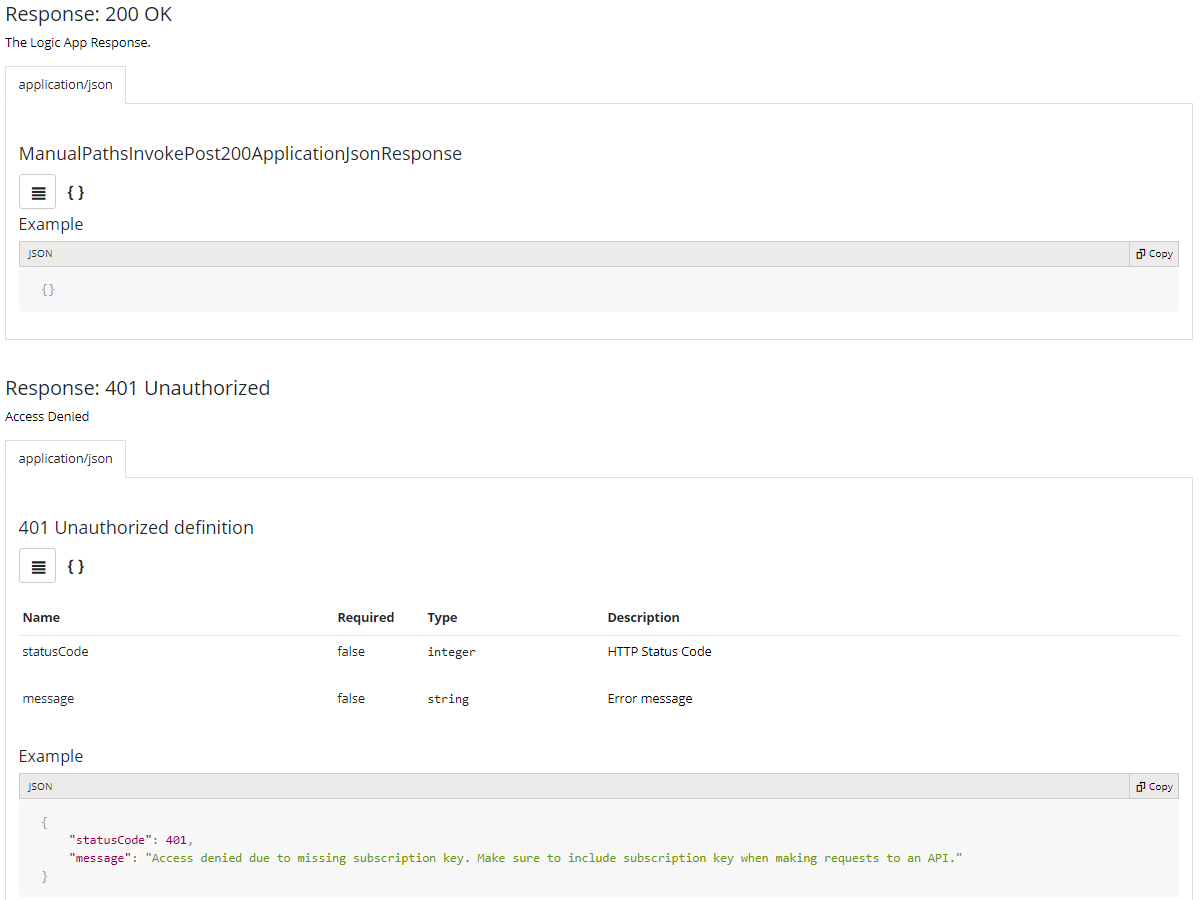
Operation Response
The Response is very identical to the Request. By default, it has a 200 Ok without any response body which is accurate because our Logic App doesn’t return any response back, only the HTTP status code.
We could leave this as it is, nevertheless, we could improve a little by adding different and expected HTTP status codes like:
- or a
To improve this experience and empower our APIs with better documentation, we need to:
- Access to your APIM on the Azure Portal.
- And on the left menu, under the APIs section, click the APIs option.
- Select the API, in this case, BizTalk Alerts API, and on the Design panel select your operation, let’s start to select the first one host-instances-notification and then click Open form-based editor to edit the Frontend settings.
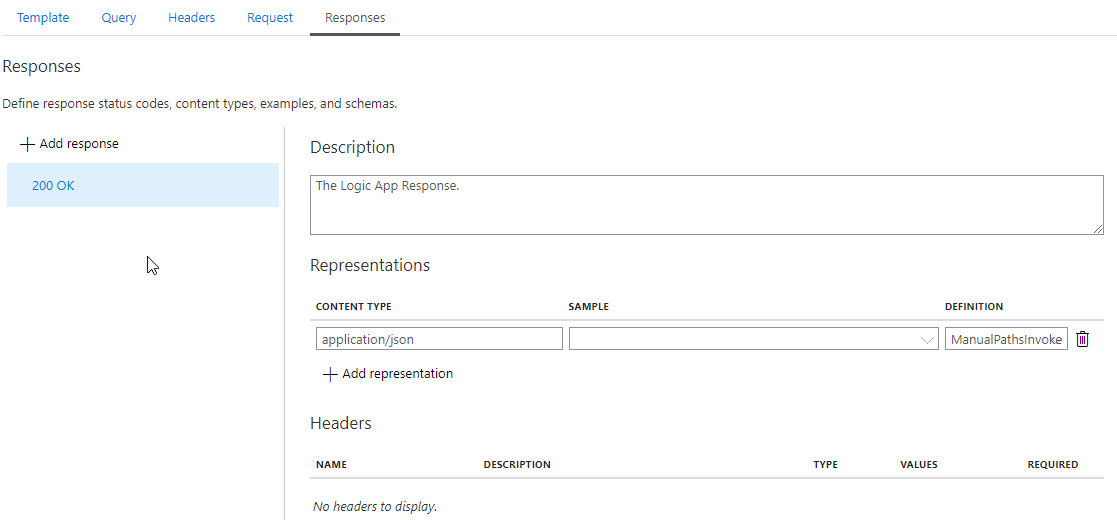
- On the Frontend panel, select the Responses tab
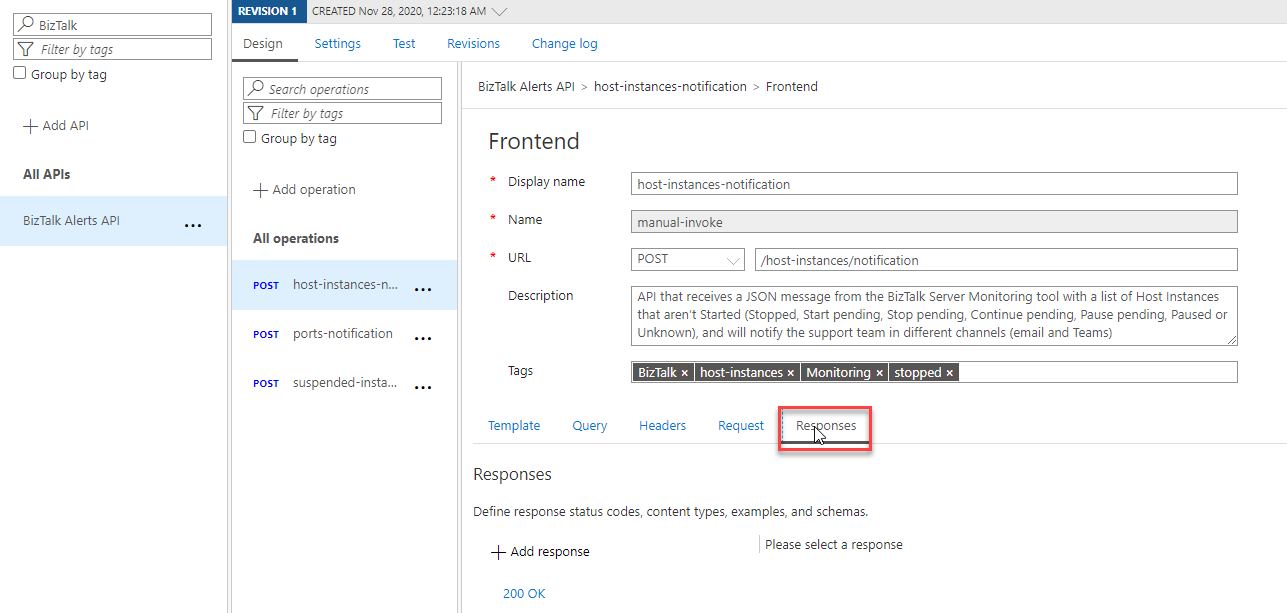
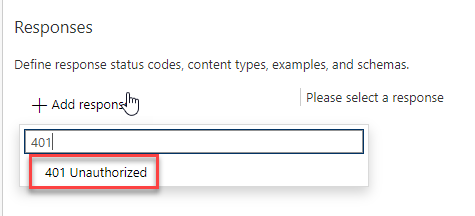
- On the Responses panel, click +Add response. On the text box type, 401 Unauthorized and select the 401 Unauthorizedoption from the list.
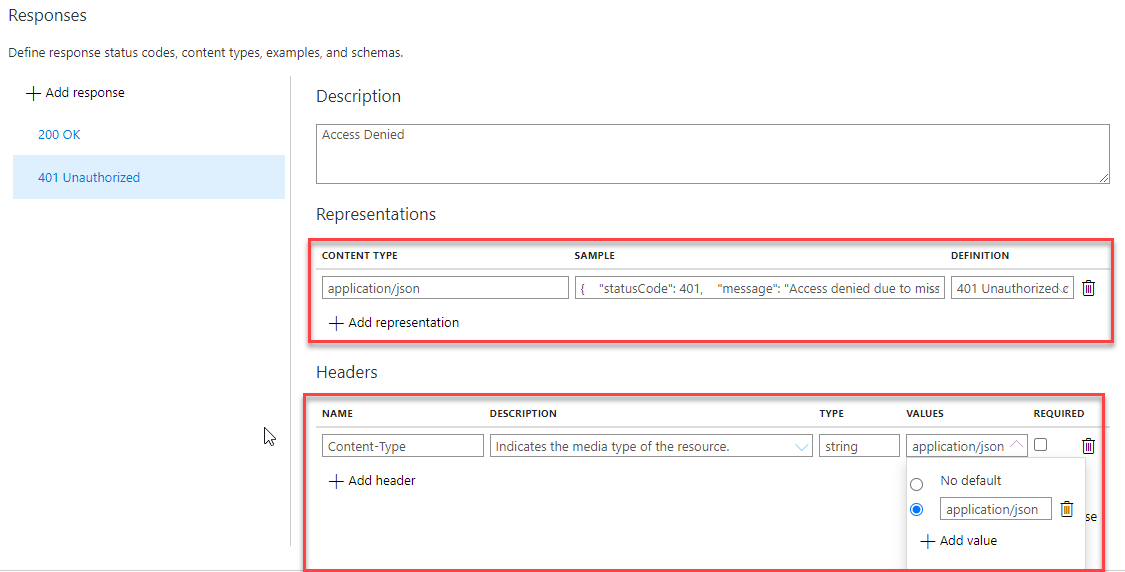
- Now from the 401 Unauthorized panel perform the following settings:
- On the Description property provide a short description, for example, Access Denied.
- On the Representation, select + New representation, select application/json, and provide the following sample:
{
    "statusCode": 401,
    "message": "Access denied due to missing subscription key. Make sure to include subscription key when making requests to an API."
}
-
- On the Definition, select + New definition
- On the Create new definition panel, you will notice that based on the Sample (JSON) that we provide earlier, it already generated a Payload, i.e., a JSON schema. It is a good start but it still needs to be improved for a better documenting experience.
- Copy that Payload to an external editor of your choice, like Notepad++ or Visual Studio Code and for each field add a definition property describing the goal of that specific field.
- Additional you can also add the following properties: default and examples
- Provide a Definition Name like 401 Unauthorized definition, and select Create definition.
- On the Headers, select + Add header
- From the table, add the header information, for example:
- Name: Content-Type
- Description: Indicates the media type of the resource. (optional)
- Type: string (optional)
- Values: From the list, select + Add value, and enter the value application/json and select this vale as default
- Note: you can add several options if that makes sense to your operation.
- And then click Save.
- Do the same for other response types.
Once again, anyone who enters on the developer portal, a new partner, a new developer, etc., knows exactly what will be responses expected responses from each specific operation. With that the developer can prepare its code to handle these know responses.
Simple and easy, don’t you think? What else do you need in terms of documentation? In my opinion, nothing! I only wished to have always this kind of documentation available in my projects, useful and straightforward instead of word documents full of unnecessary information to fill pages that only get in the way and lack the vital information.
I hope you are enjoying this series of posts.