
Calling a flow from another flow is nothing new. Makers can wire up multiple flows using the HTTP Request Trigger and HTTP Action. While this is possible, it creates additional friction as makers have to manually construct request and response messages using JSON.
Microsoft recently provided first-class support for calling a flow from another flow by introducing a new action called Run a Child Flow. In this blog post, we are going to explore a scenario where we will have multiple Parent flows that will share a Child, or nested, flow.
Background
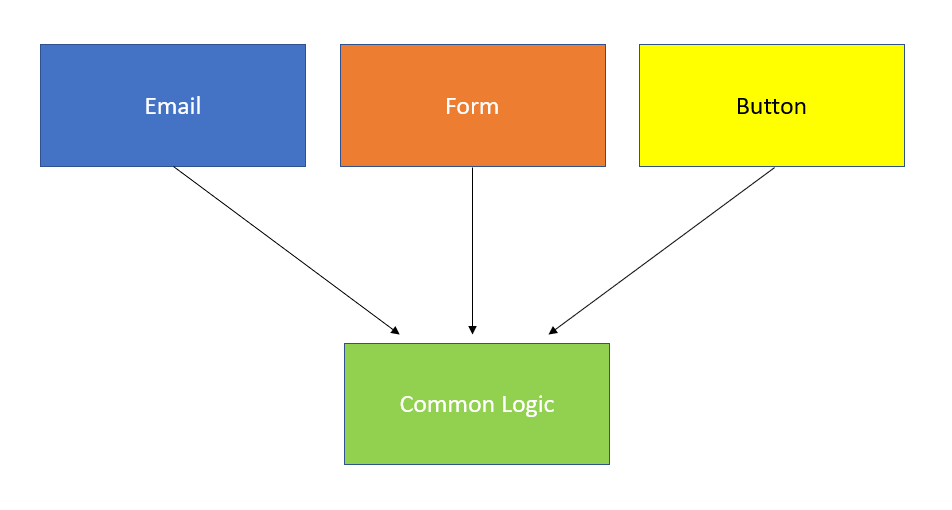
A core scenario for leveraging child flows is to centralize shared logic or processing. In our scenario, we are going to centralize how we log and create tasks in a SharePoint site. We will build all this logic in our Common Logic flow. We will then expose this flow using an HTTP Request Trigger. When we do so, we make this flow visible to other Parent flows that want to call this flow. In our situation, we will create new SharePoint tasks from channels like Email, Microsoft Forms, or Flow Buttons.
Prerequisites
There is a prerequisite for building child flows. We need to use a Solution.
When we go to use the new Run a Child Flow action, it can only discover flows that are in the same solution.
As a result, it is best to create the child flow first, which can be accomplished within the Solution Explorer.
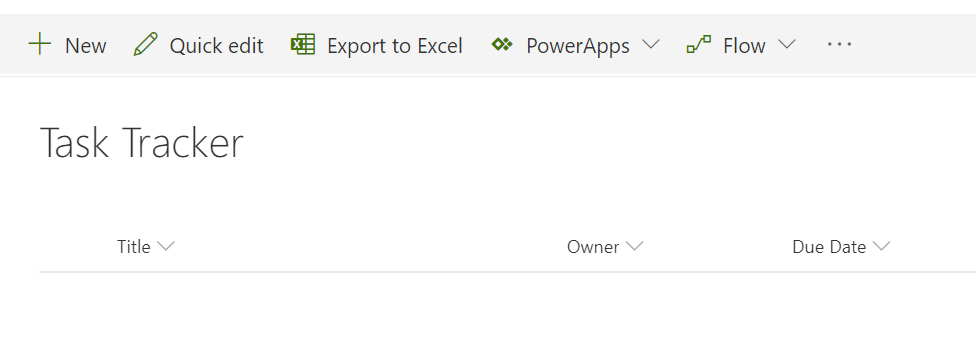
In addition, we will be storing our tasks in a SharePoint List. We also need to create a list that has the following fields: Title (Text), Owner (Text), Due Date (Date).
Building our Child Flow
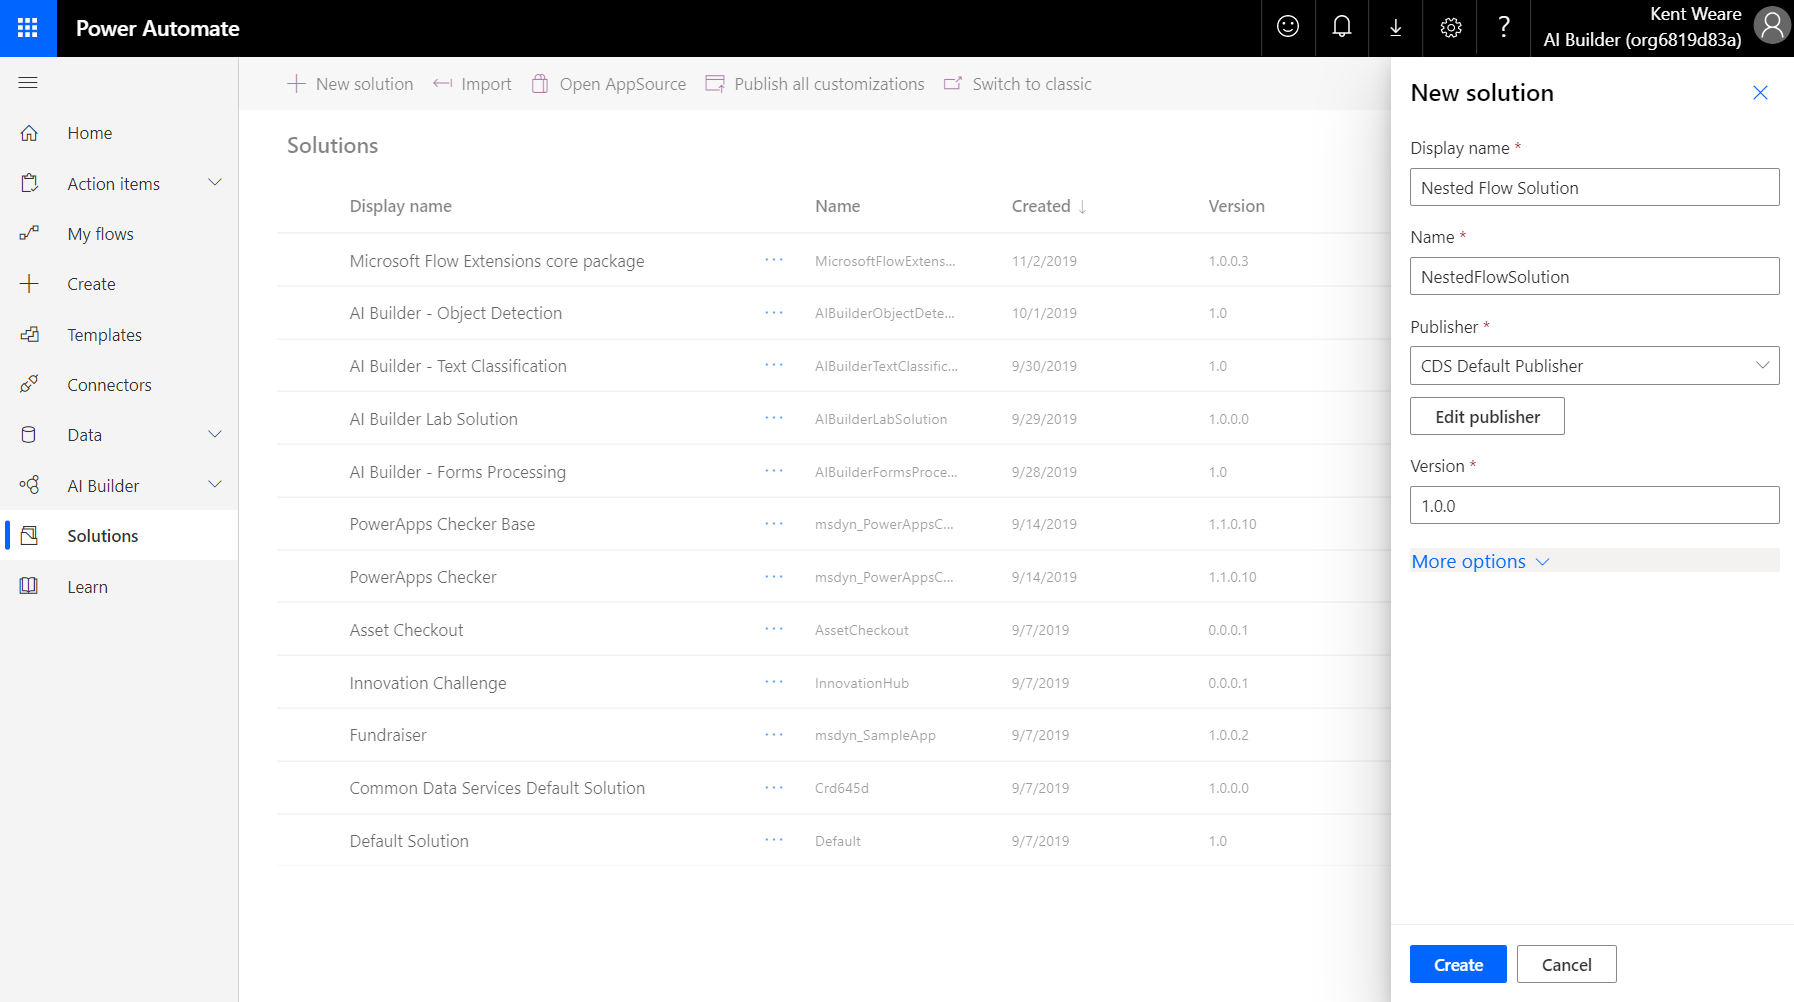
- To create a new Solution, click on Solutions from the left navigation. We now need to provide a Display Name, Name, Publisher and Version. Click Create once these values have been provided.
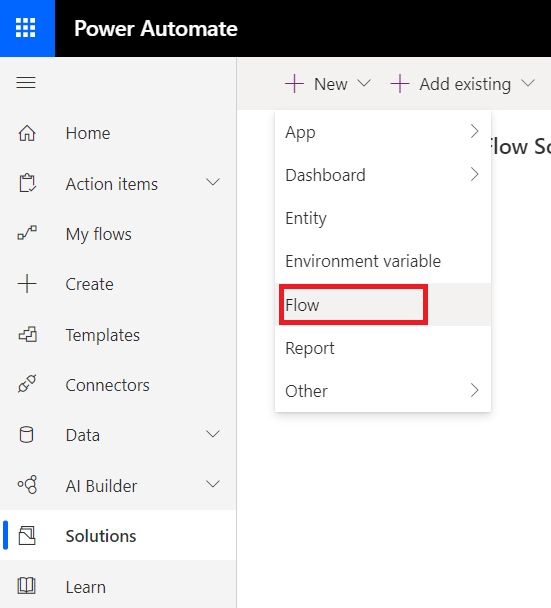
- We now need to create our flow and can do so by clicking on New – Flow.
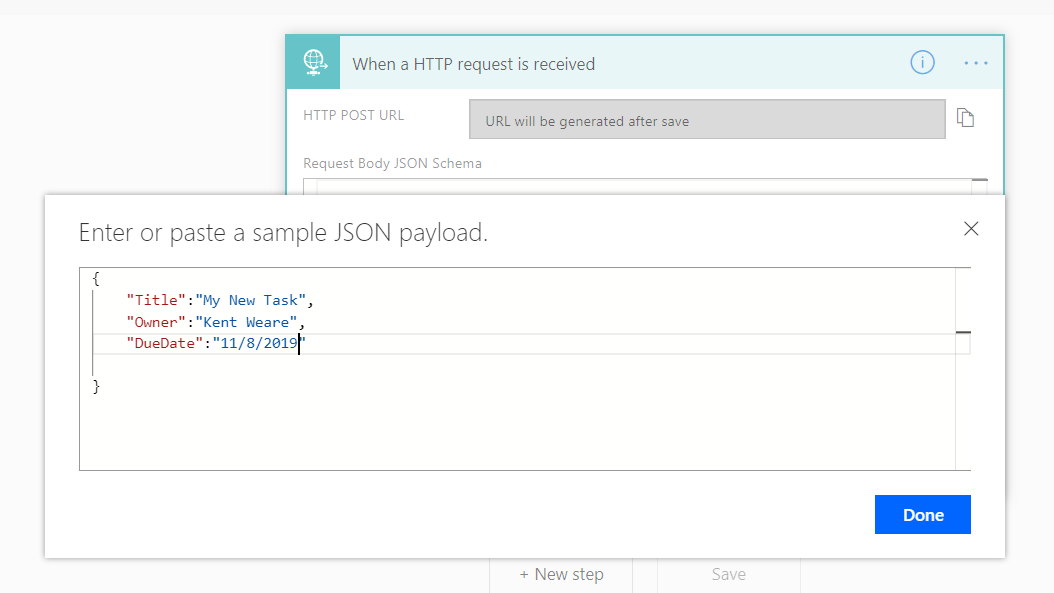
- Our child flow will use an HTTP Request Trigger and we will want to provide a JSON schema so that the flows that call our child flow know what the data attributes they need to pass. We can use a sample JSON payload to represent the inbound message we are expecting.
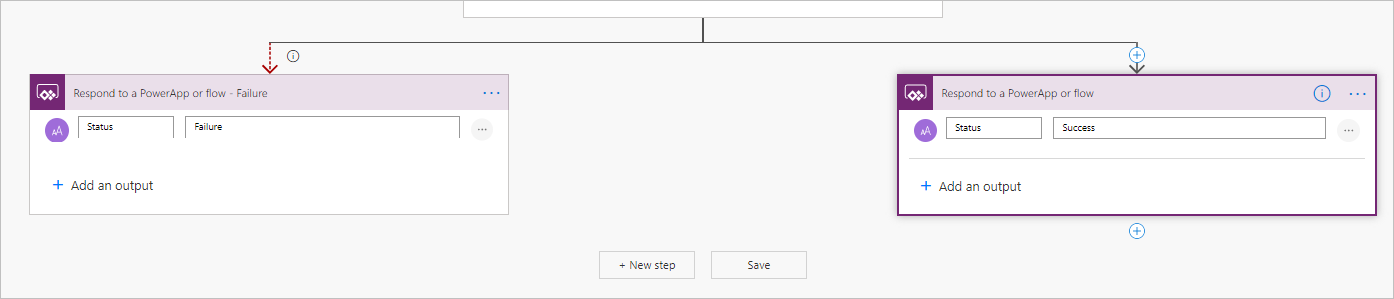
- We will then add a SharePoint – Create Item action that includes data mapping from our trigger. We also need to add a parallel shape after our SharePoint action. Within our parallel shape we will add Respond to a PowerApp or flow action. We need one action that represents a successful insert into SharePoint and one that represents a failure.
- Within these actions we will add a Text field called Status and in our failure branch we will include a value of Failure. In our success branch we will also include a Text field called Status and will include a value of Success.
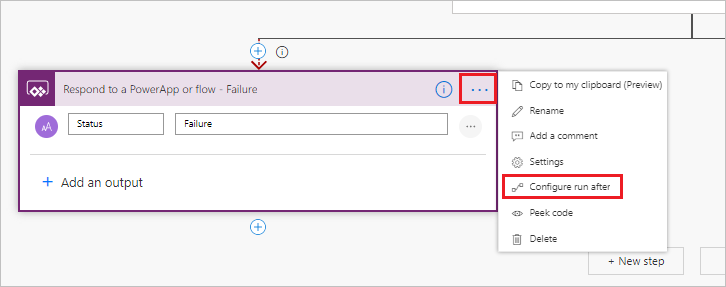
- You may be asking how do you determine which branch represents success and which represents a failure? To establish what each path represents, we can use the Configure run after settings feature to determine this. For example, in the path that we want to represent a failure and then click on Configure run after.
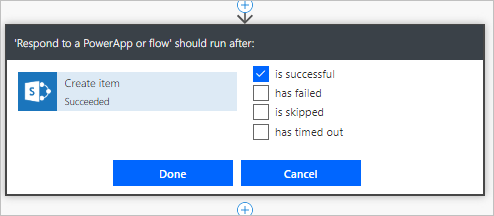
- We now want to select has failed, is skipped, has timed out and then click Done.

- For our success path, we need to select is successful and then click Done.
Note: Your environment will need to have a CDS Database for the Solutions experience to appear.
{

	“Title” : ”My New Task”,

	“Owner” : “Kent Weare”,

	“DueDate” : “11/08/2019”

}

Note: You must have the same fields in each response. For example, you will get a failure, if in one branch you return 3 values and in the other you provide 1.
At this point we have completed building our child flow.
Building our Parent Flow – Email
The first parent flow that we are going to build is our Email flow.
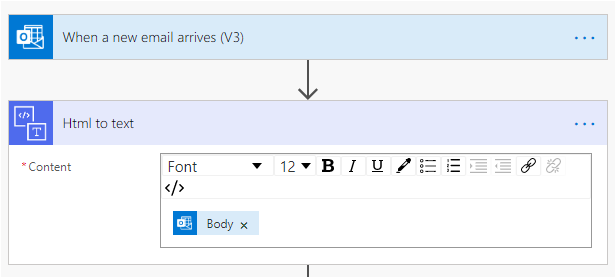
- When a new email is received, we will go ahead and pass information from this parent flow into the child flow. Since most emails are sent in HTML format, we will add an HTML to text action that will convert this HTML markup into plain text.
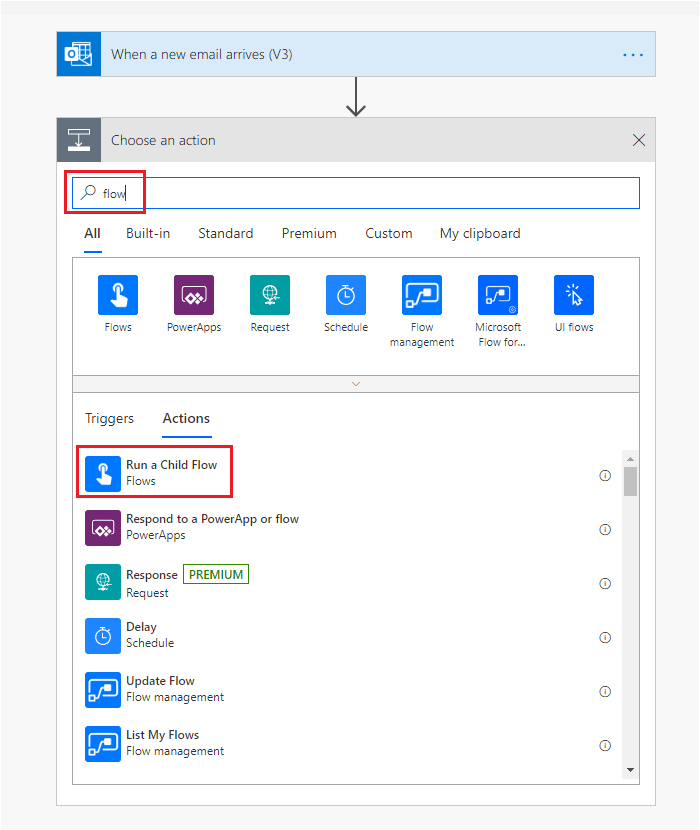
- We now need to add our Run a Child Flow action and can do so by searching for flow and then selecting Run a Child Flow.
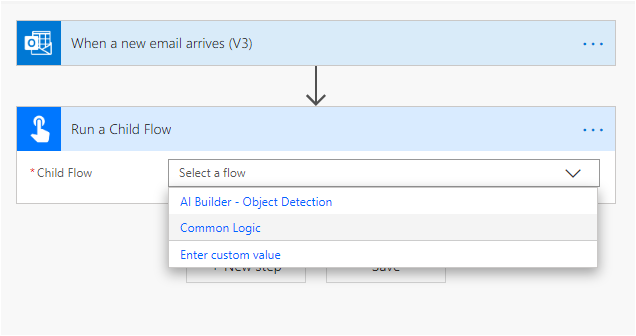
- With our Run a Child Flow action on our canvas, we now need to select our child flow. In our case we want to select the flow that we built in previous steps called Common Logic.
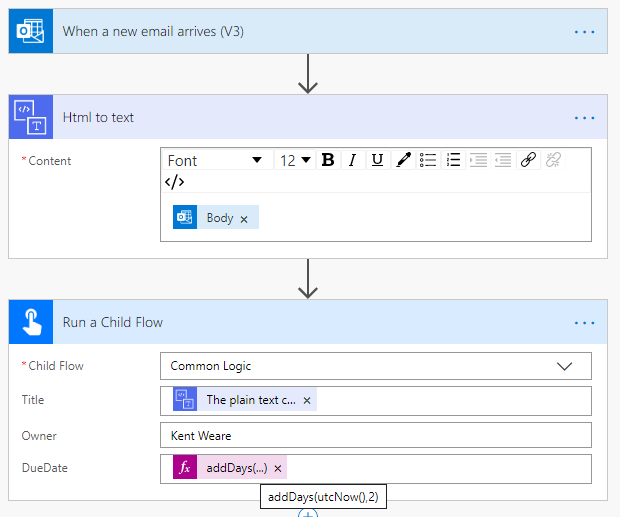
- As you may recall, in our child flow, we provided a sample message in our HTTP Request Trigger. We now see these data attributes exposed and need to populate them using the following values, including our plain converted message body text, an Owner and we will create a DueDate value expression of addDays(utcNow(),2) which will create a DueDate of 2 days from now.
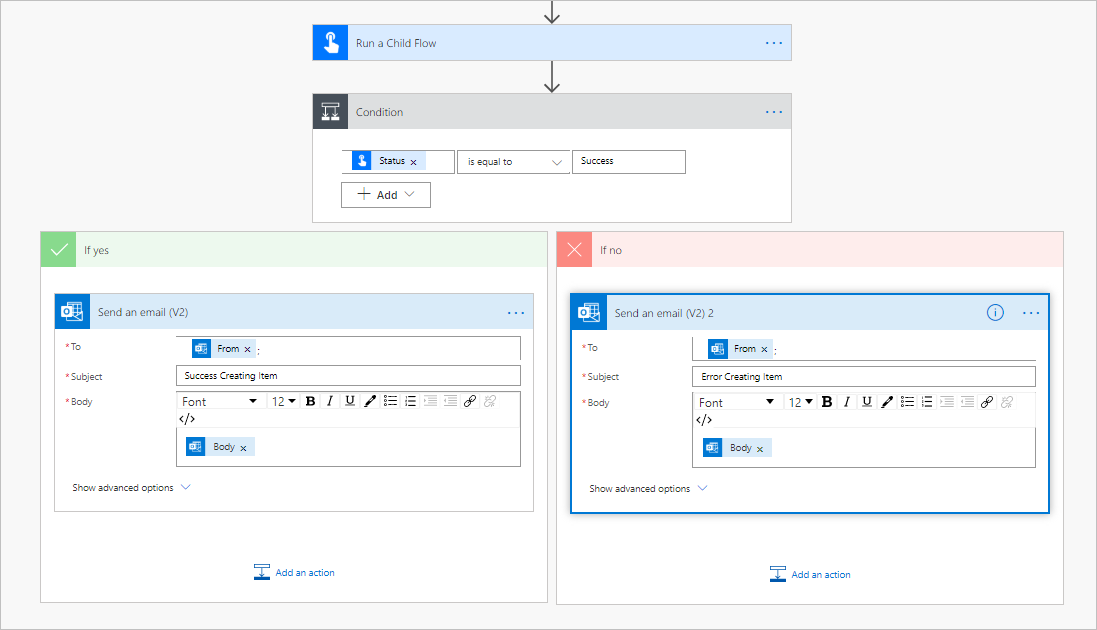
- Since our child flow can return a Status code of either Success or Failure, we need to add a Condition action where we will check the Status value that is returned from our child flow. When Success is returned, we will send an email back to the requestor indicating that their task has been successfully logged. Otherwise, we will send an email indicating that the task was not created.
Note: To avoid processing unrelated emails, provide a Subject filter within our trigger.
Note: This action will only appear when the current flow is in a Solution.
Building our Parent Flow – Forms
The next channel we are going focus on is Microsoft Forms. Our experience will be like our email example, but the difference is we will have individual attributes, unlike an email body.
Note: Since the remaining parent flows are all very similar, this post will not go through the same level of detail as the first example.
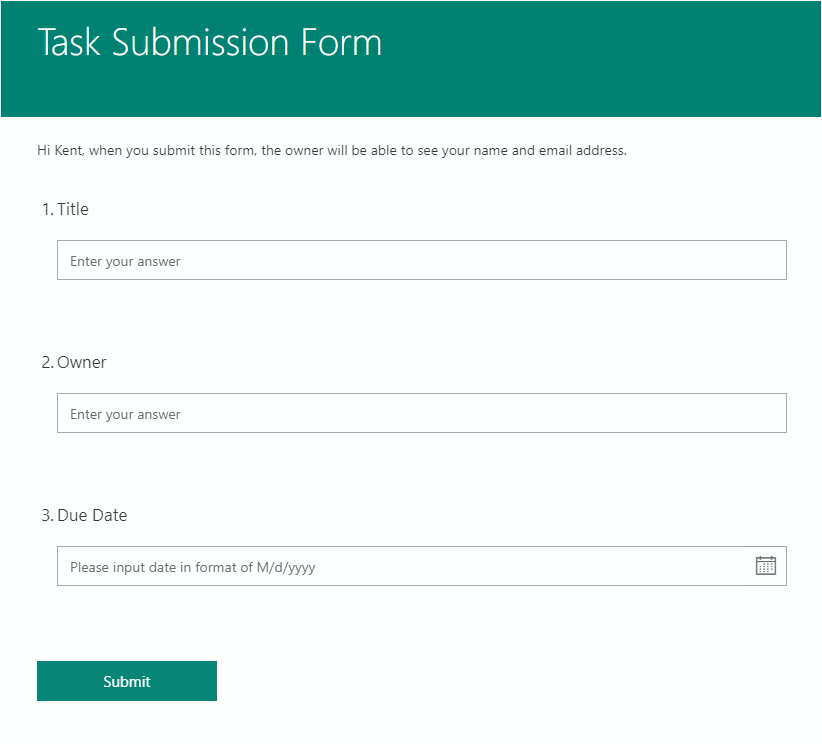
- We will create a form at Microsoft forms and will include Text fields called Title and Owner. Lastly, we will add a Due Date field that is of type Date.
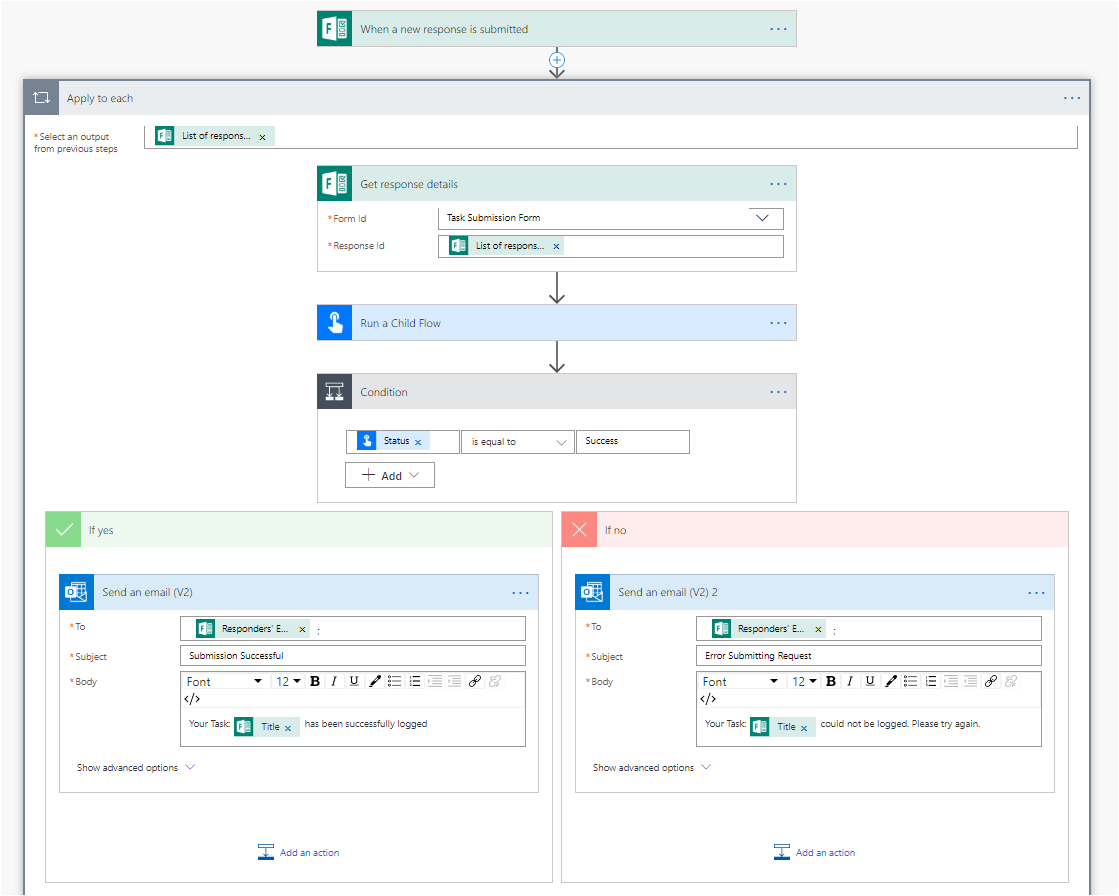
- We will now create a parent flow that will respond to these form events. This flow will be very similar to the flow that we created for our email processing. The difference is that we will use the Forms trigger and then retrieve the details. We will then map our form inputs to those in the Run a Child Flow.
Building our Parent Flow – Button Flow
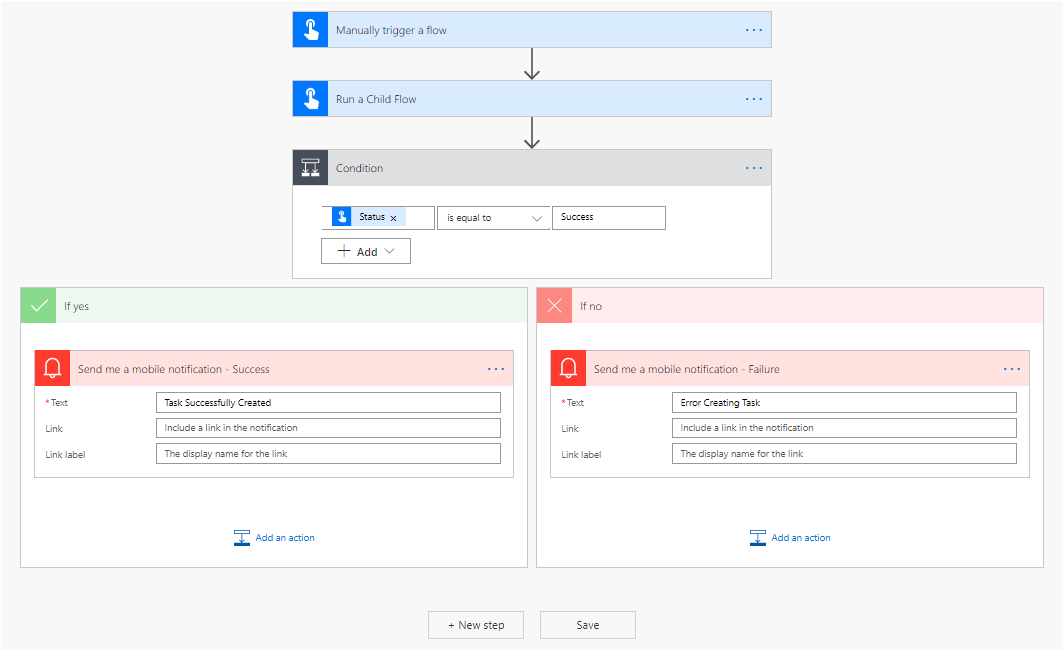
Our last parent flow that we are going to build is a flow button.
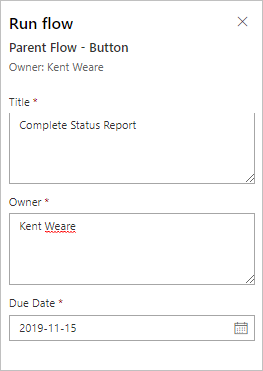
- We will create the same form inputs that we used in our Microsoft Form including Text fields for Title and Owner and a Date field for Due Date.
- We can now build our parent flow that listens to the Button Trigger and includes the data attributes that we discussed in the previous step. Otherwise the rest of our flow will look like the one that we built for our Microsoft Forms input. The difference is that we will send push notifications that update the requestor of the status of their task submission.
Note: Currently, button flows that exist within a Solution cannot be called from the flow mobile. So when testing this approach, please use the Run feature from within your web browser.
Solution
Before we perform any testing, we should see that our Solution contains 4 flows: 3 parent flows and 1 child flow.

Testing
For the purposes of this blog post we will only test the Microsoft Forms parent flow, but the other channels should also work.
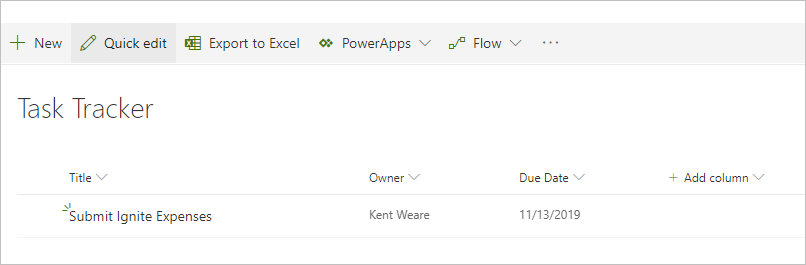
- From our Microsoft Form, we will populate our Title, Owner and Due Date fields and then click on Submit.
- If we switch over to our SharePoint List, we will discover that we have a new record has been created for our task.
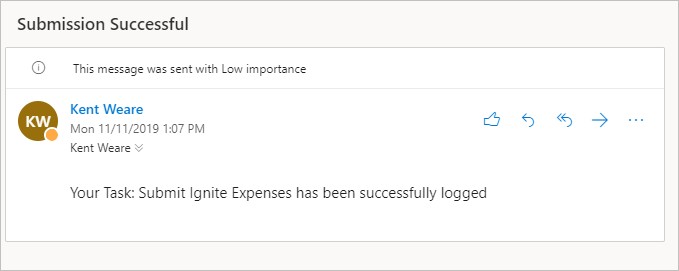
- As you may recall, in our parent flow, we have logic that detects if the task was successfully created. When it is, we will receive an email indicating that it has been created successfully.

Conclusion
Having a flow, call another flow is nothing new. It has been possible by exposing a flow using the HTTP trigger and subsequently calling that flow from another HTTP action and including the child flow’s URL including SAS security token.
However, the Run a Child Flow simplifies the ability to call child, or nested, flows by being able to iterate a list of flows that exist within a Solution. Not only does this simplify the discoverability of these child flows, but also allows you to bundle all related flows when you need to move them from one environment to another environment, such as moving from a Test environment to a Production environment.
Another benefit of using the Run a Child Flow action is that once the child flow is selected, all required action inputs are included so that it is easy to map this data. Otherwise, a maker needs to be tracking the shape of the message that the child flow is expecting and then using Compose or Parse JSON actions to construct a message that maps into the required format.