In this series of five blogs, I will cover throwing custom exceptions in Logic Apps. I will cover the following topics:
- Part I (this article) – Using the default capabilities
- Part II – Using default capabilities – Extract failure information
- Part III – Using default capabilities – Avoiding too many condition actions
- Part IV – Using a child Logic App to throw a custom exception
- Part V – Using an API Management Throw Exception API
In this blog, I will speak about “How to throw exceptions inside Logic Apps using default capabilities”. Let’s get started!
Raising exceptions
There isn’t any mandatory rule when you should or should not throw or raise exceptions. You may say that:
- In general, an exception is thrown when a fundamental assumption of the current code block is found to be false.
- Or that exceptions should be used for exceptional situations outside of the usual logic of a program. For example, an out-of-range value is likely relatively common and should be dealt with using standard if-else type logic.
Another situation where throwing an exception may be appropriate is when the problem occurs in the middle of a complicated method that would be even more complicated if it also had to handle unexpected data with if-else conditions. In those cases, we might throw an exception in order to “give up” and go back to the caller or to a catch{} block at the end of the method/process.
An exception is an event that occurs during the execution of a program that disrupts the normal flow of the program’s instructions. When an error occurs within a method, it creates an object and hands it off to the runtime system.
It may not always be evident when the use of an exception is appropriate or not, and personally, I feel that such design decisions should be made on a case-by-case basis. Now if we focus on Logic Apps, controlling all exceptional situations with conditions may lead you to:
- A complex nested conditions implementation. Be aware that there is a maximum of 8 nesting conditions in Logic Apps.
- Add much complexity to your business logic.
- For example, the use of many actions inside your Logic App workflow that at some point will cause performance issues in Visual Studio or Visual Code, and in many cases, especially if you are using Logic App Consumption in Visual Studio 2019, you would no longer be able to open that Logic App inside the editor.
There may be many ways to avoid this extra complexity or nesting conditions:
- The use of expressions instead of condition actions.
- Using child workflows to break down the logic in different Logic App workflows.
But another option to simplify the business logic is to throw or raise custom exceptions, of course, conjugated with a good error-handling strategy.
Now you may be thinking that throwing an exception is quite a common and straightforward task to do, no matter the programing language you use. For example, in C# it is as simple as:
throw new Exception(“This is the cause message”);
In BizTalk Server, it is also as simple as using a Throw Exception shape and defining the properties of the shape: Exception object and Description.

On Logic Apps Consumption or Standard, well, throwing exceptions is not a simple task. It should be, but unfortunately, it isn’t.
In this series of blogs, we will be addressing some of the possible ways to address these needs but also addressing some of the following questions:
- How can I implement throw exceptions?
- What are the out-of-the-box features that I can use to throw exceptions?
- How can I customize the error description?
- What are the advantages and disadvantages of each approach?
The exercise that we will be using
To explain all the approaches on how we can raise/throw an exception inside Logic Apps, we will always be using the same simple and basic exercise:
- We will be receiving a JSON message thru the Request – When an HTTP request is received, trigger to start our Logic App with the following and basic payload:
{
    "name": "John",
    "age": 30,
    "email": "john@example.com"
}
- On our Logic App, we have two primary validations we need to perform in order to process the message:
- The Name must be John!
- The Age needs to be greater or equal to 18.
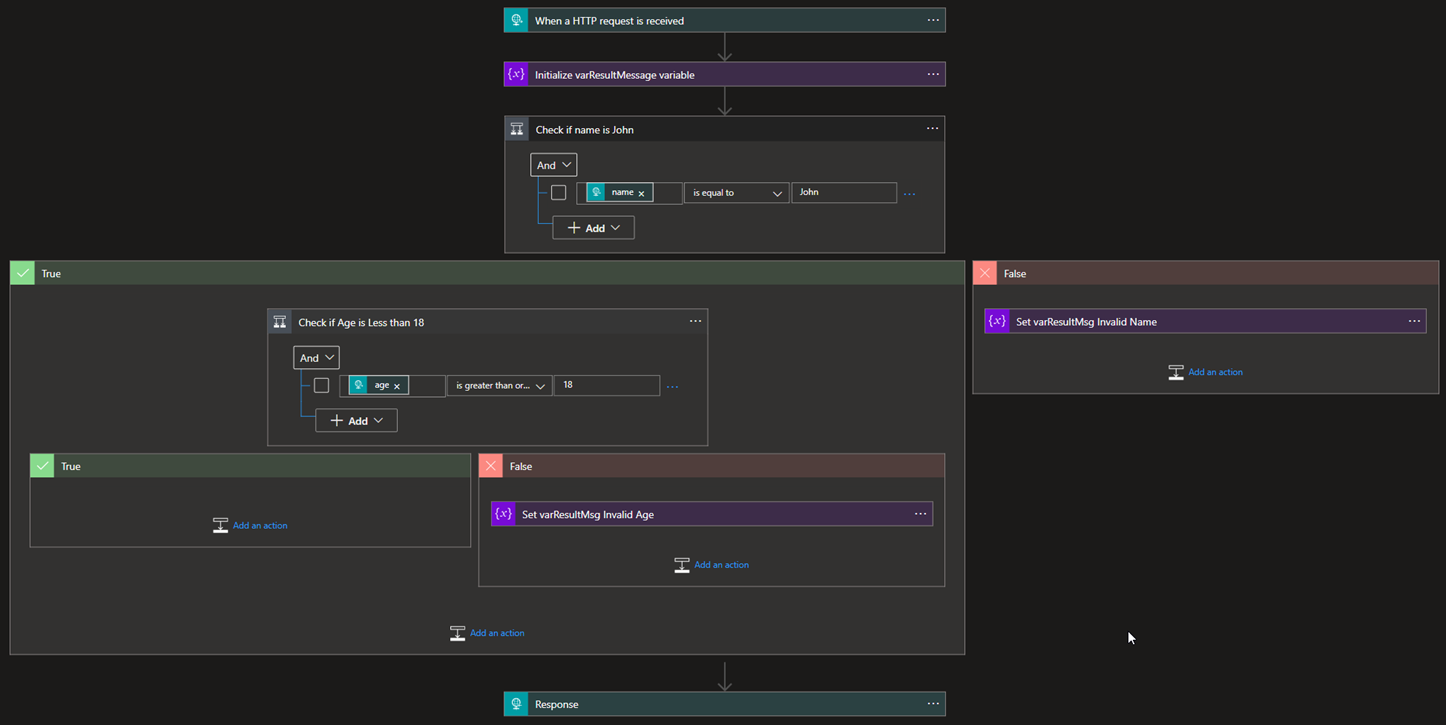
As we mentioned before, on Logic Apps Consumption or Standard, well, throwing exceptions is not a simple task. It should be, but unfortunately, it isn’t. Until the moment this blog is being written, there isn’t an action that allows us to throw a new custom exception. That means, by default, we need to control all exceptional situations with business logic inside our workflows. The end result will be something like this:
If we test this solution with the sample provided earlier, we will end up receiving the following response:
{
    "Result": "Application accepted!"
}
If we change the name to a different one other than John, we will get the following error message:
{
    "Result": "Richard is an Invalid Name!"
}
Or if we change the age, then we will get the following error:
{
    "Result": "Invalid Age! You need to be older than 18."
}
Of course, this is a very simple dummy scenario that will serve only as a proof of concept. But even saying that you will find yourself with these similar requirements in many of your projects:
- Calling an external service or application that returns a 200 HTTP code with an error response on the body.
- Validating if the result has values or if it is an empty object.
- Performing some data validation. And so on.
The problem with this strategy, even if possible and accepted in simple workflows, is that it will lead to:
- A complex nested conditions implementation. You need to be aware that there is a maximum of 8 nesting conditions in Logic Apps.
- We then can use different strategies like using expressions instead of condition actions or using child workflows to break down the logic in different Logic App workflows and reduce or avoid this extra complexity or nesting conditions.
- Add much complexity to your business logic.
- For example, the use of many actions inside your Logic App workflow that at some point will cause performance issues in Visual Studio or Visual Code, and in many cases, especially if you are using Logic App Consumption in Visual Studio 2019, you would no longer be able to open that Logic App inside the editor.
- Performance deprecation.
A very good approach to minimizing these outcomes (I don’t want to call them issues) and, at the same time, simplifying our workflows is to throw or raise custom exceptions, of course, conjugated with a good error-handling strategy.
Approach 1: Throw exceptions inside Logic Apps with Default capabilities using a Variable and Expression
Well, it is a fact that we don’t have, at least for now, an action to throw a new exception, but that doesn’t mean we cannot implement an approach to achieve the same outcome.
While researching possible alternatives, I found that one of the common approaches used and described in many blog posts was forcing an error using an expression.
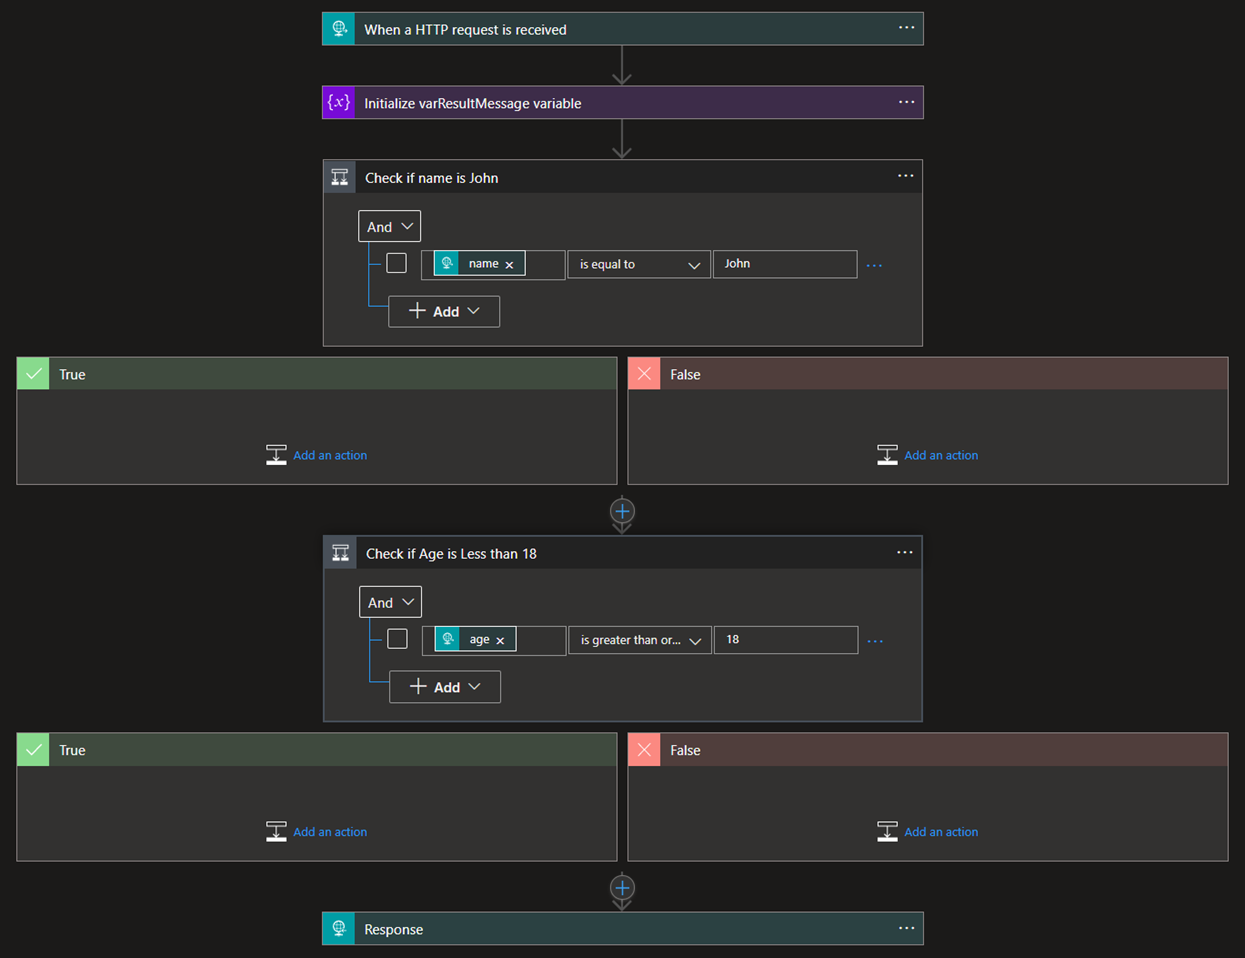
Taking our previous sample exercise, let’s:
- Move the Check if Age is Less than 18 condition outside the Check if name is John condition and place it below.
- And remove the Set variable actions inside the False branches under both conditions.
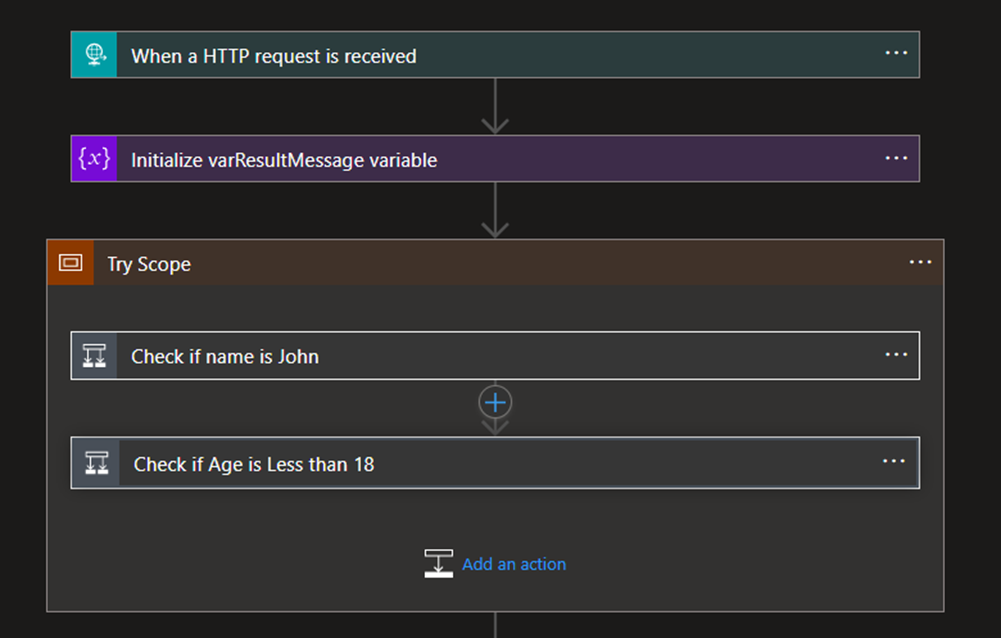
Now, because we are going to throw exceptions, we need to have a way to catch them. For that, we are going to add a Try Scope and a Catch Scope. To do that we need to:
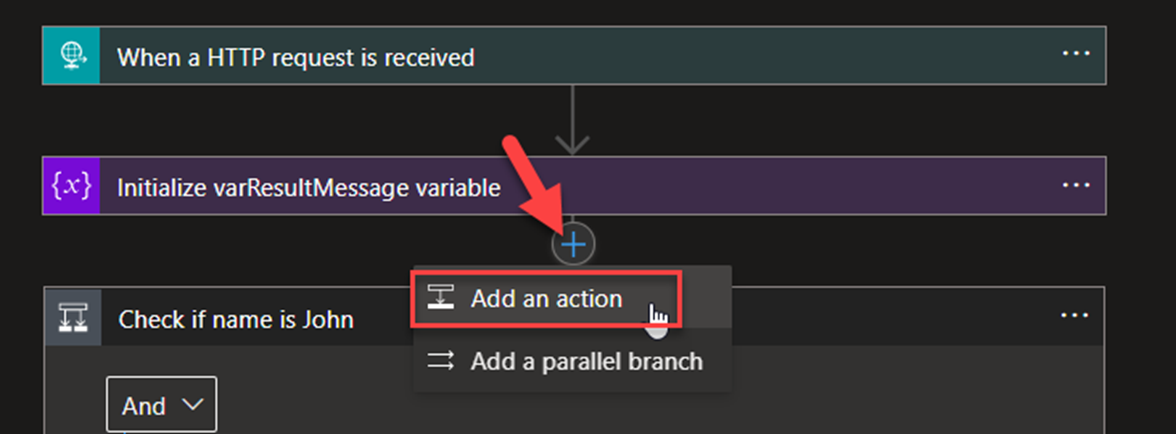
- Below the Initialize varResultMessage variable action, click + to insert a new step, and then click Add an action.
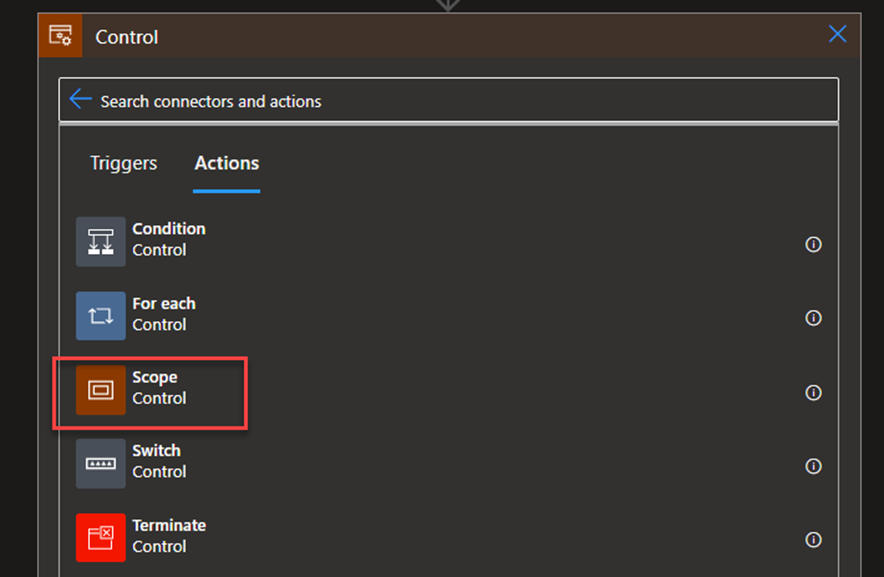
- On the Choose an operation window, search for Control and then select the Scope.
- Call the action Try Scope and then move the two existing condition to inside this scope.
- Now, below the Try Scope, click + to insert a new step, and then click Add an action.
- On the Choose an operation window, search for Control and then select the Scope
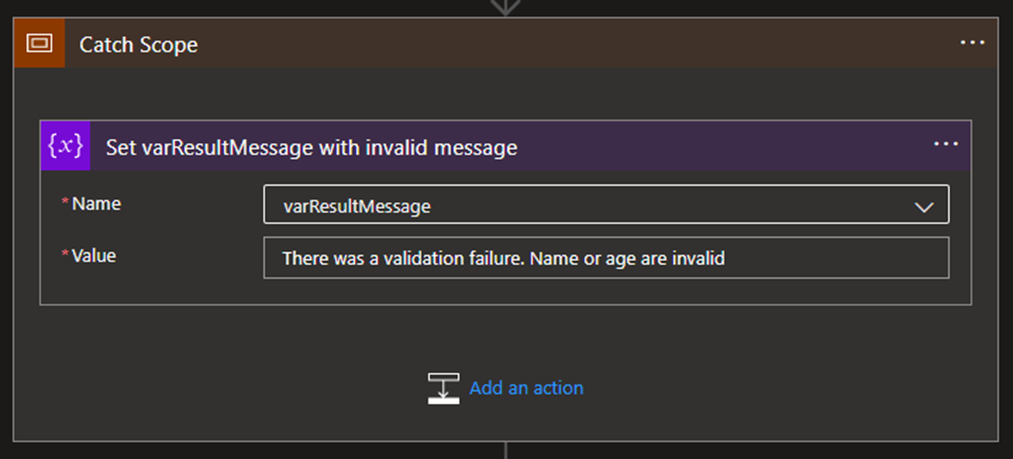
- Call the action Catch Scope and then click on Add an action to add a new Variable – Set variable
- On the Set variable action, set the following configuration:
- On the Name property, select the variable that is created at the beginning of this workflow, in my case varResultMessage.
- On the Value property, type: There was a validation failure. Name or age are invalid.
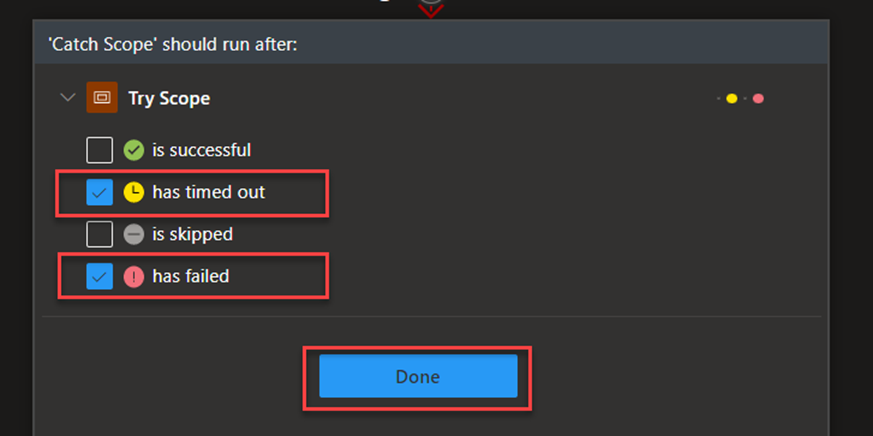
- Now, on the Catch Scope action, click on … (3 dots), and then select the Configure run after.

- On the ‘Catch Scope’ should run after: panel, expand the Try Scope option, then select the following options, and then click Done:
- has timed out.
- has failed.
Because we change an existing workflow and add a Catch Scope before the Response action, we then need to configure the run after also setting on the Response Action. For that, we need to:
- On the Response action, click on … (3 dots), and then select the Configure run after
- On the ‘Response’ should run after: panel, expand the Catch Scope option and select the following options and then click Done:
- is successful.
- has timed out.
- is skipped.
- has failed.
Now that we have all our main processes designed, we need to implement the throw exceptions. For that, we need to:
- Below the Initialize varResultMessage variable action, click + to insert a new step, and then click Add an action.
- On the Choose an operation window, search for Variable and then select the Initialize variable action.
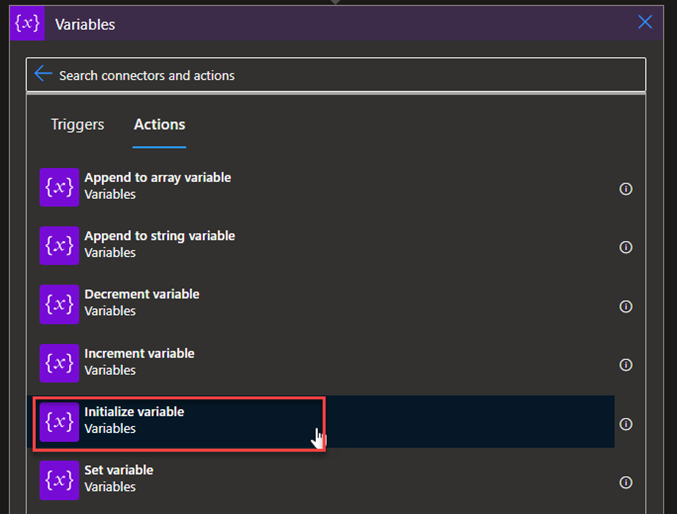
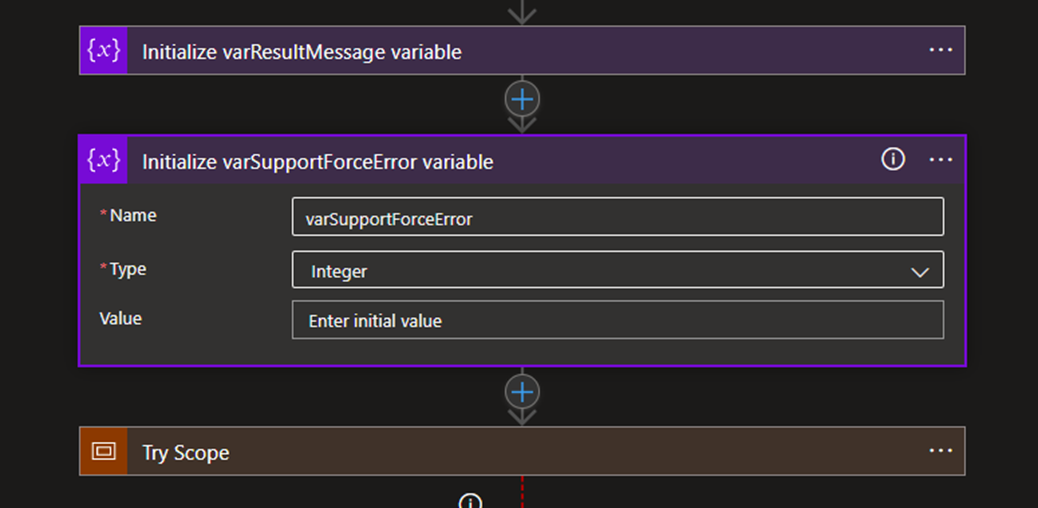
- On the Initialize variable action, set the following configurations:
- On the Name property, type varSupportForceError.
- On the Type property, choose from the combo box the Integer
- Expand the Try Scope, expand the Check if name is John condition, and on the False branch:
- Click on Add an action.
- On the Choose an operation window, search for Variable and then select the Set variable
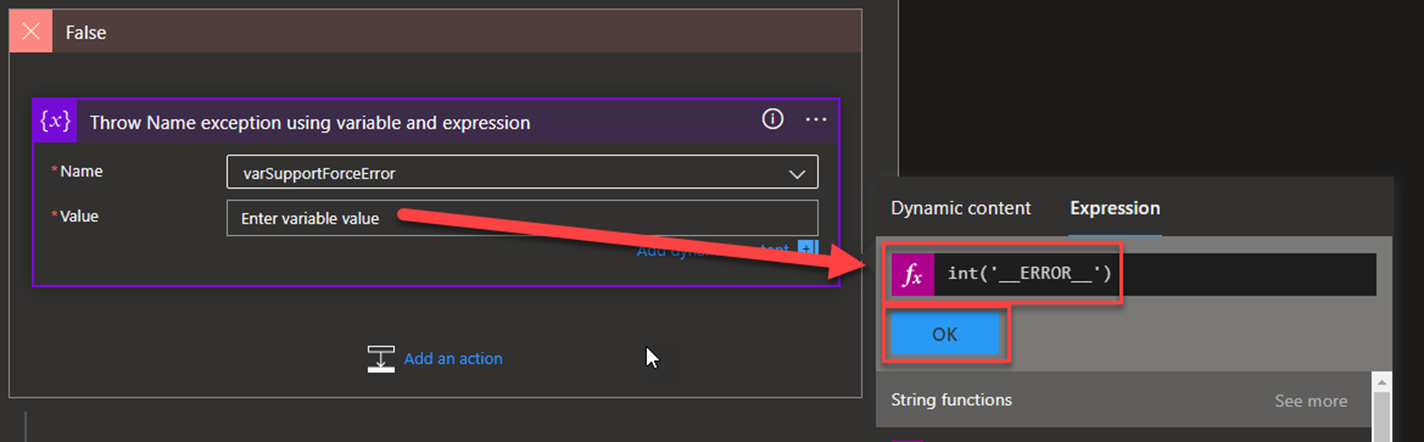
- On the Set variable action, set the following configurations:
- On the Name property, select the variable that is created at the beginning of this workflow, in my case varSupportForceError.
- On the Value property, put the following expression:
- int(‘__ERROR__’)
- And now, we need to do the same on the False branch of the Check if Age is Less than 18 condition:
- Click on Save to save our workflow.

Now, if we test this first approach with a valid message, we will get the same outcome, that will never change in all approaches, but if we test it with an invalid name or age, we will end up getting the following generic response:
{
    "Result": "There was a validation failure. Name or age are invalid."
}
That is basically the error message we defined on the catch scope.
Despite this being a simple approach and the most common way people are raising errors, this has a big drawback to any good enterprise integration solution:
- A good description of the errors or failures.
Of course, you must look at the big picture in this approach and see it implemented in more complex business logic. For that, we don’t want a generic error saying an error happened somewhere or a validation failed somewhere. We need, or ideally, we want, the correct and clear error message or reason.
The advantages of the current solution are:
- Business Logic Complexity: We have, or we can reduce, the business logic complexity by avoiding nested conditions.
- Minimize risk-reaching Limits and configuration references for Azure Logic Apps: There is a maximum of 8 nesting conditions in Logic Apps. See more here: Limits and configuration reference for Azure Logic Apps.
I hope you enjoy and stay tuned for part II.