
In my previous blog posts, I talked about some of the most essential best practices you should have while working with Power Automate:
And of course, some tips and tricks that you should apply while working with Power Automate:
Today I’m going to speak about another Best practice, Tips, and Tricks: using Scopes. Inside Power Automate flows, scopes have many functionalities, but it is probably best known for its ability to organize your business flows!
#5 Using Scopes
Most users tend to think that Scopes is a strange action that is not there to do anything other than to help you organize the Flow a little better, but that is not true. The reality is that inside Power Automate flows, scopes have many functionalities:
- Region statement: the capability to organize your Flows and have specific areas that you can collapse and expand whenever you need it.
- Try-Catch-Finally statement: advance error handling capabilities

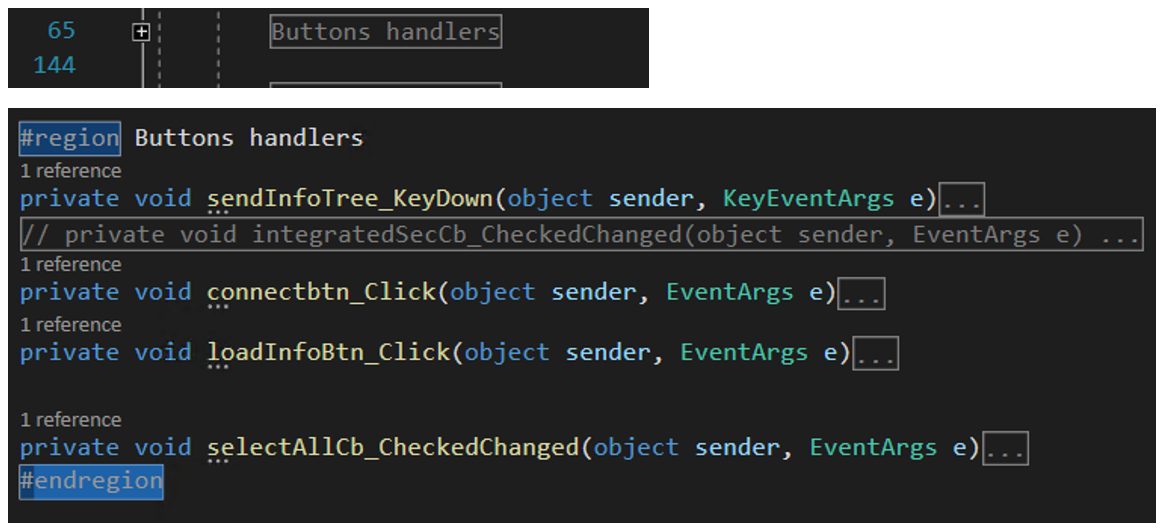
Region: Organizing flows capabilities
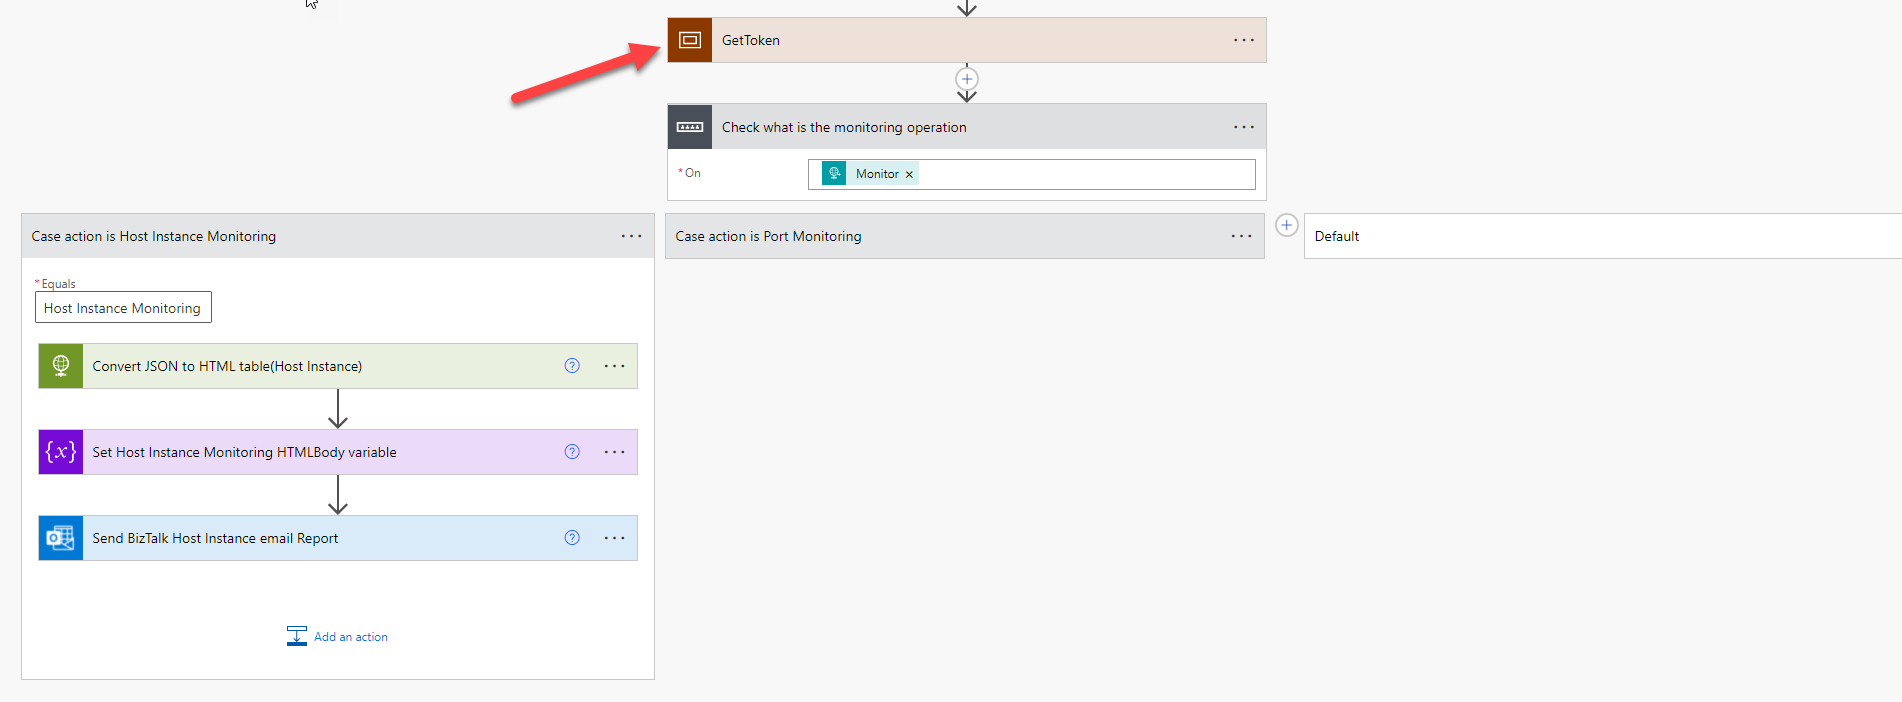
Once you start working with Power Automate Flows, it doesn’t take to long for you to realize that some of these business processes can become very large and complex, and this will cause problems or difficulties for you to read and maintain. Not everyone has big screens with huge resolutions to minimize this problem. Rather than continuously scrolling up and down and side to side to navigate inside your Flow, you can use the Scope action to “group” actions together that we can collapse and expand whenever you need by simply clicking on the title of the scope.
This is a pretty familiar task that all developers use inside their code to organize and improve code readability, which will increase efficiency. And someday down the road, when another programmer comes across your source code, they will be very thankful. For example, in C#, we use Regions to accomplish that:
The Scope action can archive the same, and you should use it wisely inside your Flows. This will allow you to:
- Hide sections of the flow you’re not currently working on.
- Minimize the size and clean up your working area
- And let you focus on the actions you’re actively editing.
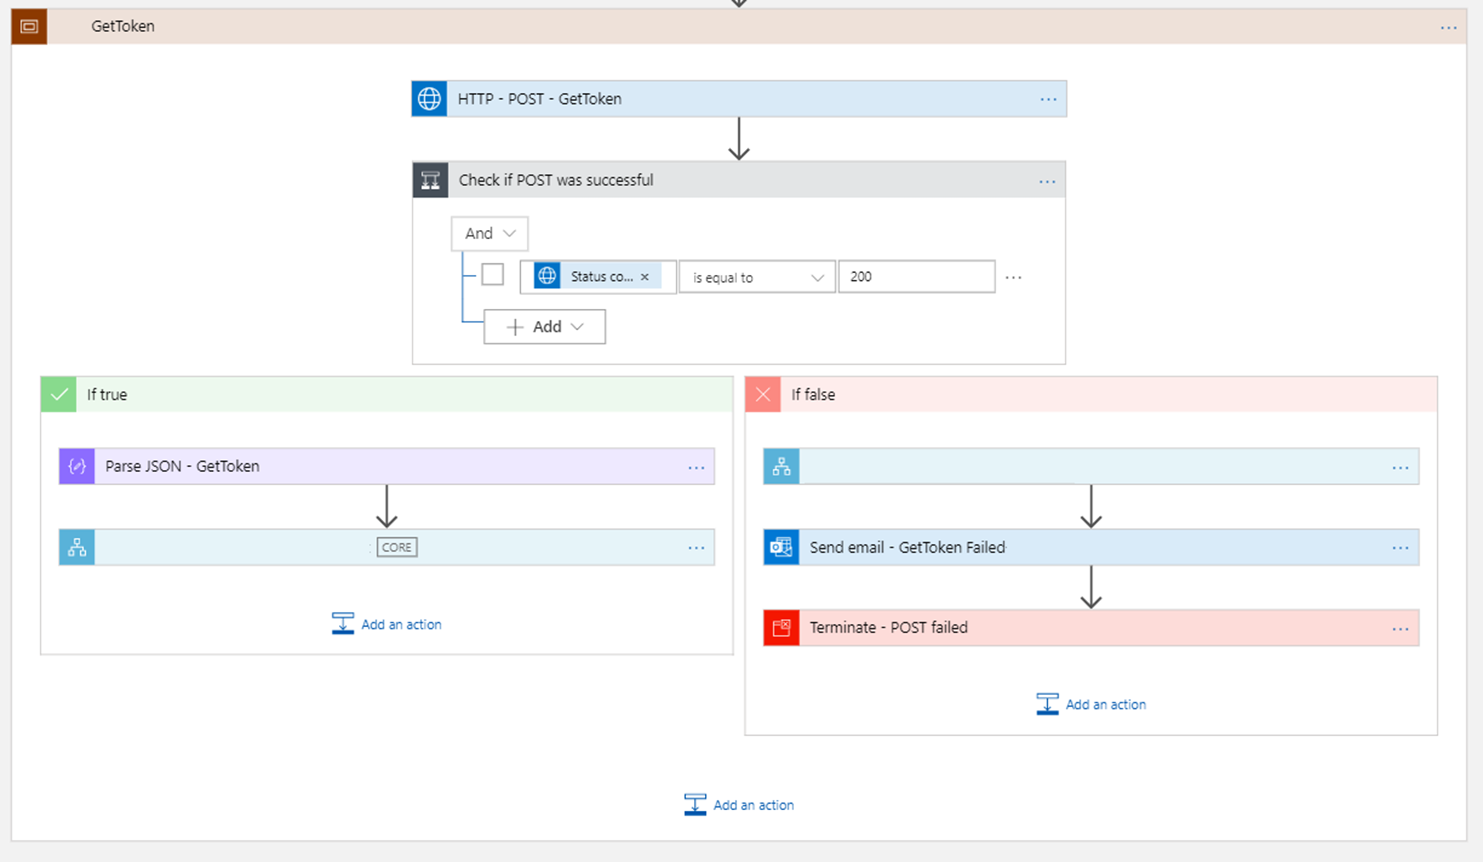
Of course, do not forget the naming convention best practices. To make your flow easier to follow and read, you should give the scope a name that describes the behavior of the actions inside. In our example, we gave GetToken, but that could be even better, like Get <type> Token from <system>.
Try-Catch-Finally: Advance error handling capabilities
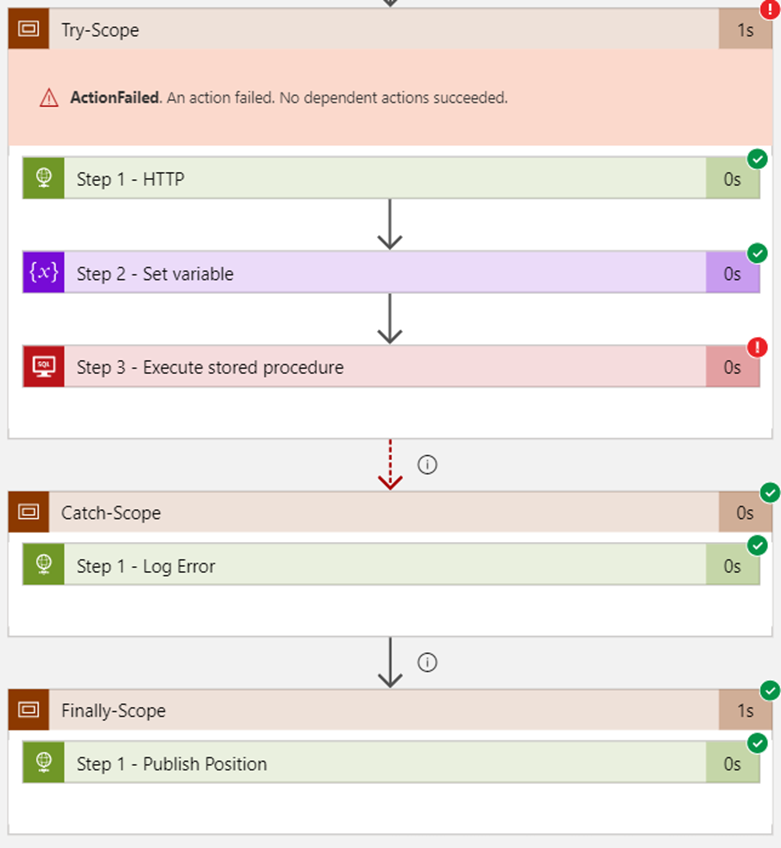
Another major Scope capability is the availability to implement Try-Catch-Finally functionalities.
When designing a business process, one of the most important design considerations you need to keep in mind is what happens when things go wrong. By default, Power Automate allows us to handle errors by using the Configure run after settings at a per action level.
An upcoming action runs if the current one is successfully finished by default, but you can always change this behavior to implement a try-catch per action level.

This can be perfect for a simple business process, but in more complex or real enterprise scenarios, there will be situations where we want to handle errors from multiple actions in a single place and implement specific tasks if a failure occurs. Once again, this is quite normal on traditional programming languages like C#, where we use a try-catch or try-catch-finally statements:
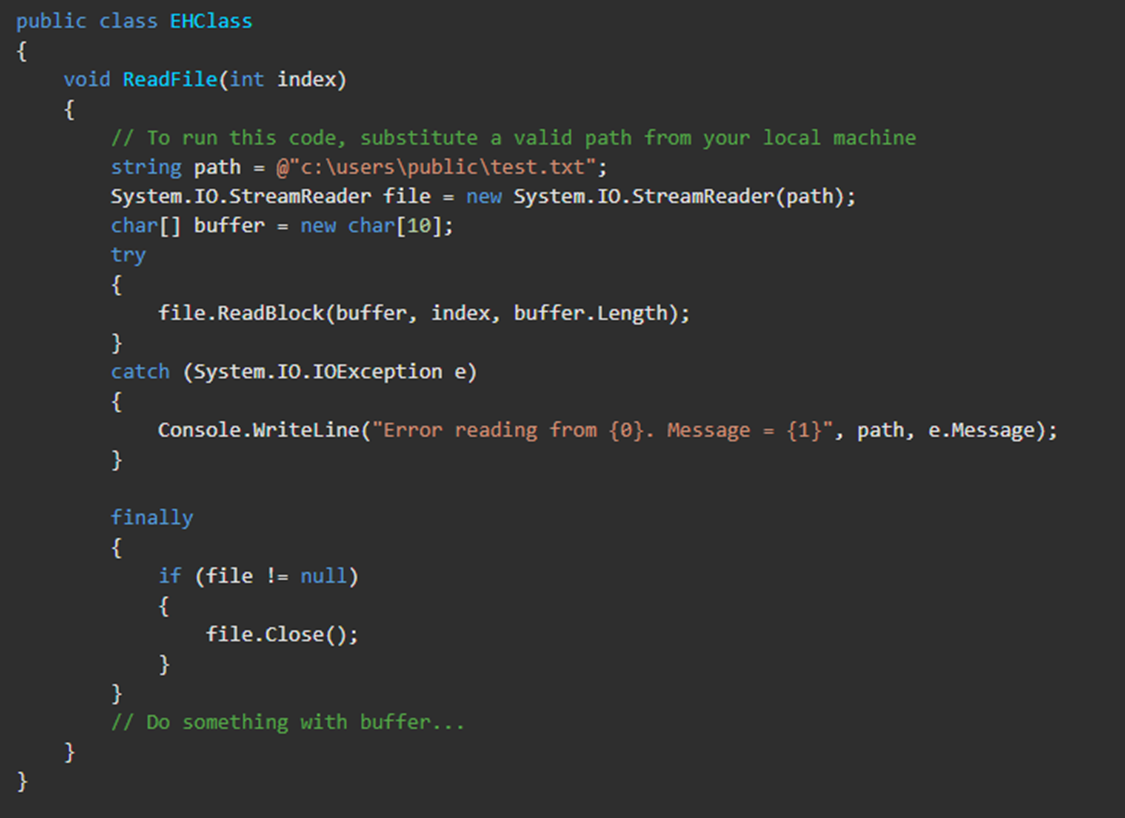
The try-catch-finally statement handles some or all of the errors that may occur in a block of code. Errors can be coding errors made by the programmer, errors due to wrong input, and other unforeseeable things.
- The try statement allows you to define a block of code to be tested for errors while it is being executed –> this will be your Actions inside Power Automate that describe the logic of your business flow.
- The catch statement allows you to define a block of code to be executed if an error occurs in the try block –> this will be your Actions inside Power Automate that your want to run if some failure occurs in the standard actions of your business flow
- The finally statement lets you execute code after try and catch statements, regardless of the result (if there was a fail inside the try statement or if everything was completed successfully).
Note: The catch and finally statements are optional, but you need to use one of them (if not both) while using the try statement.
These try-catch or try-catch-finally statements can be implemented inside Power Automate flow by using conjugation of:
- Two Scopes actions for implementing a try-catch statement.
- Or three Scopes actions for implementing a try-catch-finally statement.
Stay tuned for the following Power Automate Best practices, Tips, and Tricks. In the next one, we will be explaining step-by-step these try-catch capabilities using Scopes.