Introduction
Managing identities, through the creation of connections, in Azure Logic Apps offers a lot of conveniences, but it can also cause a lot of friction. Establishing connectivity to endpoints such as SaaS platforms or APIs couldn’t be much simpler as you are typically required to provide a username and password, or security tokens like SAS, in order to authenticate with these services. However, this simplicity comes to some challenges. What if you have multiple developers working on a project and you don’t want them all knowing the password, or secret, for a particular system(s)? Or worse yet, what if they are signing into these business systems using their own credentials? A similar concern exists with keys and secrets.
Do you really want all your developers and contractors to be aware of your keys? How do you know that these keys may be used in other projects outside of your control?
Azure Logic Apps provides an extremely quick way to get an integration up and running. However, in order to adhere to an organization’s security policies, using a shared account or personal credentials may be against those policies. So how can an organization overcome these challenges? The answer lies in Managed Identities (MI), formerly known as Managed Service Identities. Let’s dive deeper into how we can use MI.
What are Azure Managed Identities?
Managed identities are a feature of Azure Active Directory and allow you to authenticate against Azure Active Directory without using user credentials. The Microsoft Azure documentation on Managed Identities cites one of the benefits as not requiring developers to have credentials in order to authenticate:
“A common challenge when building cloud applications is how to manage the credentials in your code for authenticating to cloud services. Keeping the credentials secure is an important task. Ideally, the credentials never appear on developer workstations and aren’t checked into source control. Azure Key Vault provides a way to securely store credentials, secrets, and other keys, but your code has to authenticate to Key Vault to retrieve them.
There are two different types of managed identities:
- System-assigned where Azure creates an identity for the instance in the Azure AD tenant and is trusted by the subscription instance of the tenant. In the event the Azure service instance that the identity is enabled on is deleted, the managed identity is automatically deleted.
- User-assigned managed identities are stand-alone Azure resources. While still trusted by the subscription that it is hosted in, it is not tied to an Azure service instance and therefore is not deleted should that Azure service instance be deleted.
Creating Azure Managed Identity in Logic Apps
- In the Azure portal, navigate to Logic apps.
- Create a new Logic app.
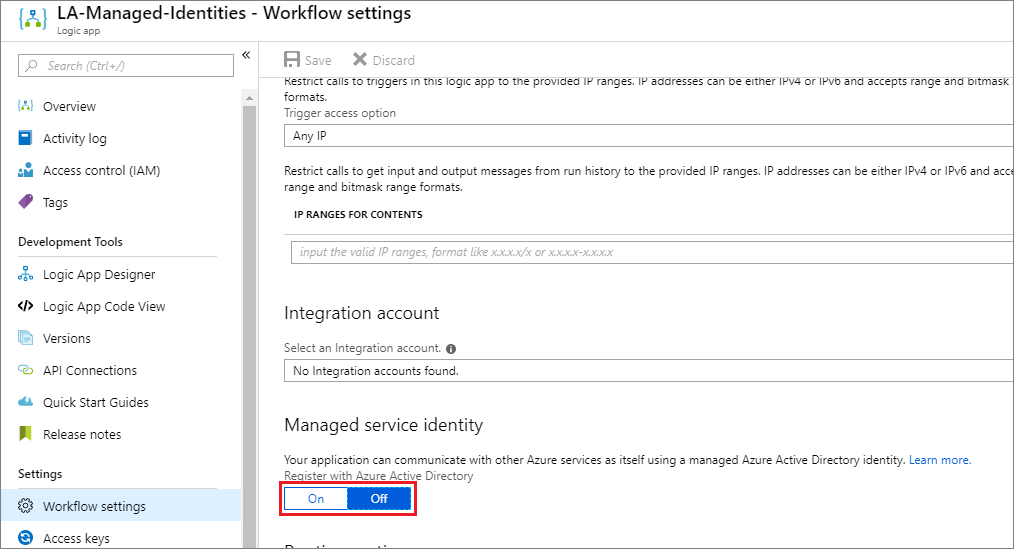
- On the Logic app’s main page, click on Workflow settings on the left menu.

- Enable Managed service identity by clicking on the On toggle.
- When you enable the Managed service identity, two text boxes will appear that include values for Principle ID and Tenant ID. These values will be blank until you save the Workflow settings. Upon saving, you will discover these values are populated.

Azure Key Vault Integration
Currently, the HTTP connector includes an authentication option for managed identities. Until we see this capability being added to other Azure Active Directory-based connectors, we are limited to this connector (action). This does limit the value that potentially can be realized through this feature, but it is worth showcasing so that when additional connectors have managed identity support, there is some documentation that allows developers to adopt this authentication implementation.
The scenario we will describe in this post is connecting to Azure Key Vault. For those who may not be familiar with Azure Key Vault, it is a trusted secret vault where developers can store application secrets so they do not need to be kept in the application configuration. The concern with keeping this type of data in application configuration is that it is exposed to many people and typically stored in source code repositories. This problem has been widely documented and has even prompted the development of a tool called TruffleHog which will scan GitHub repositories looking for projects that have secrets exposed and then notifies project admins that their secrets have been exposed. Storing your secrets in Azure Key Vault, completely removes this risk.
However, what we can do is keep application secrets in Azure Key Vault and then retrieve our value(s) at runtime. In our example, we will store an API key in this secret store and then pass this key into the API call at runtime.
The first thing we need to do is create an Azure Key Vault instance. We can create a key vault instance by searching the Azure Marketplace and searching for: “Azure Key Vault”. To create the key vault, we need to provide a Name, Subscription, Resource Group, Region, and Pricing tier. Once we have provided these details we can click Create to provision our key vault.
With our key vault created, we now need to provide a secret(s). We can do so by
- Clicking on
- Next, we can click on Generate/Import.
- We now need to provide an Upload option = Manual, a Name and a For the purposes of this blog post, we will not provide activation or expiration dates, but these are great ways to manage the lifecycle of your secrets.
- We now need to click Create to finish creating this secret.

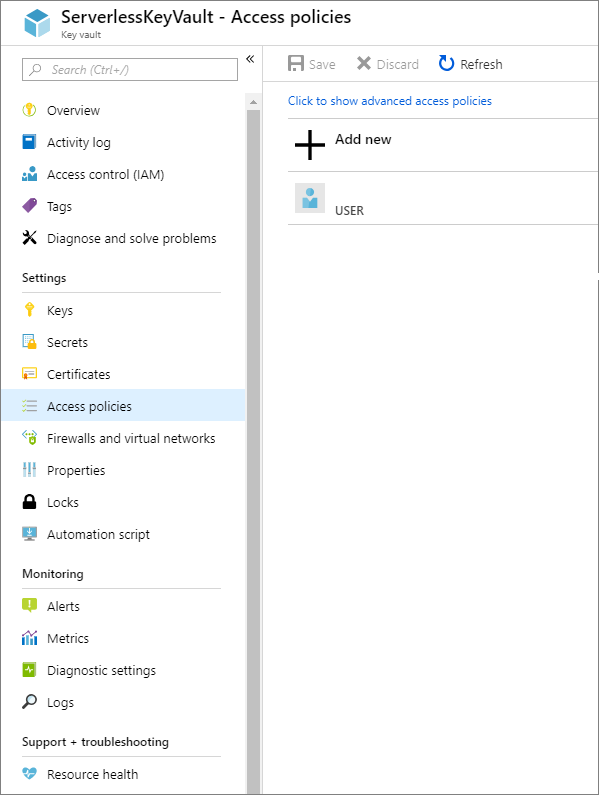
With our secret created, we now need to assign access to this secret. In our scenario, we want to provide our managed identity, which was created when we built our logic app. To set permissions, we need to:
- Click on Access policies from the left navigation.
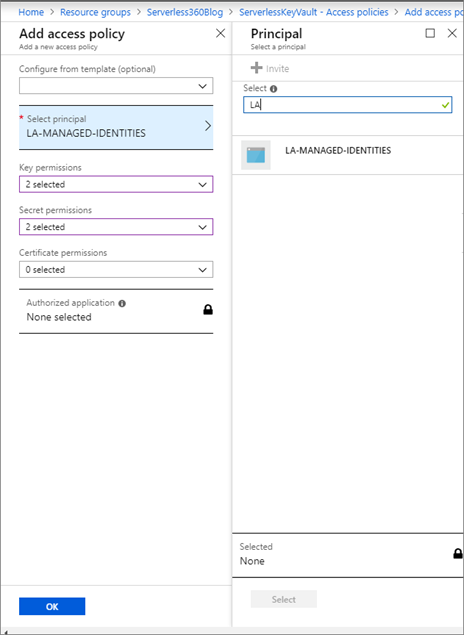
- We will now click on Add new to create a new policy that allows access to our key vault. To create this policy we need to select a principal. We can search for the name of our logic app and select it.
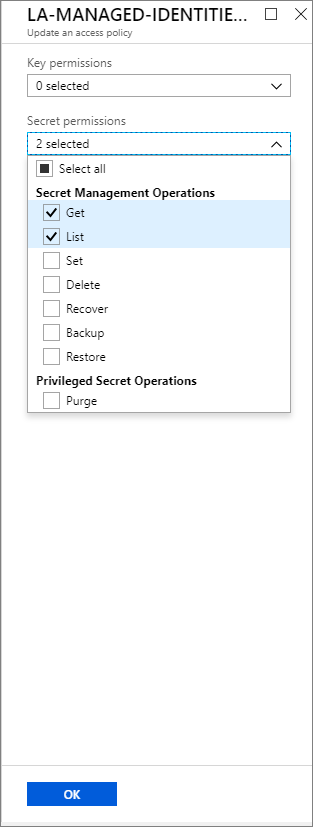
- Now we need to assign the appropriate permissions required to access our secret. For the purpose of this post, we will enable the ability to list secrets and get a secret, including its value.
- We do not need to apply for Key or Certificate permissions, so we can click on OK to continue.
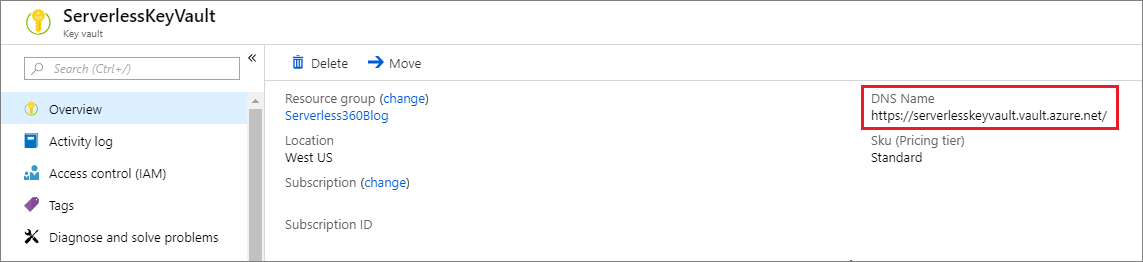
Before we configure our logic app to connect to our key vault using a managed identity, we need to obtain our DNS Name for our vault. We can get this value from the Overview page
Updating our Logic App
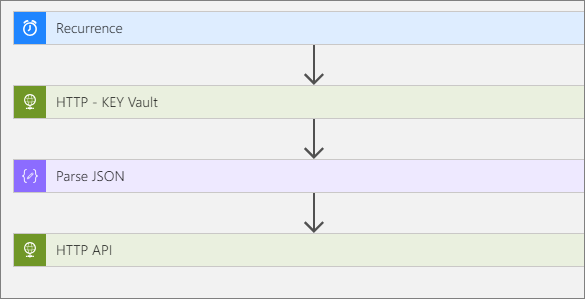
Our logic app is going to be pretty simple as that isn’t the core motivation of this blog post. It will consist of:
- Recurrence trigger
- HTTP Key Vault Action
- Parse JSON action to provide a strongly-typed structure to our key vault response
- An HTTP request to our API where we will pass in our key.
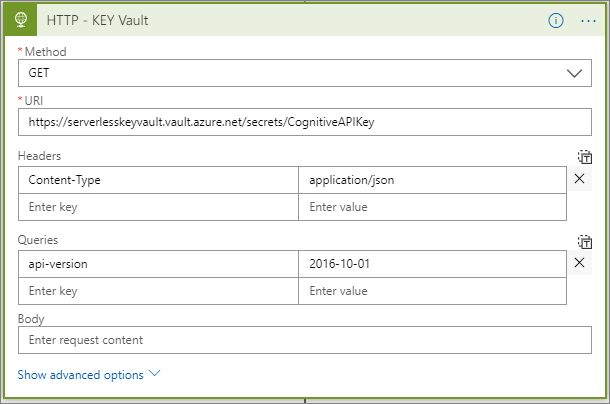
The configuration within the HTTP – KEY Vault action is particularly important in order to connect to the key vault service by using a managed identity. Our configuration needs to include the following:
- Method: GET, since we will be retrieving data.
- URI: This is the DNS Name that we previously retrieve and “/secrets/” plus the name of our secret that we want to retrieve.
Note, if we want to receive a listing of all keys we can exclude the name of our secret.
- Api-version: We need to provide a value of 2016-10-01 which reflects the version of the key vault API that we are calling.
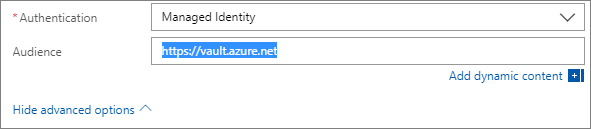
- Next, we need to click on Show advanced options. When we do so we will see an Authentication drop down which we need to set to Managed Identity.
- We also need to assign an Audience which we will set to https://vault.azure.net.
In our Parse JSON action, we will provide a sample output from our HTTP – Key Vault call. Our message body looks like the following:
{
"value": "secret-value",
"id": "https://YourSecretValueUrl",
"attributes": {
"enabled": true,
"created": 1541891225,
"updated": 1541891225,
"recoveryLevel": "Purgeable"
}
}
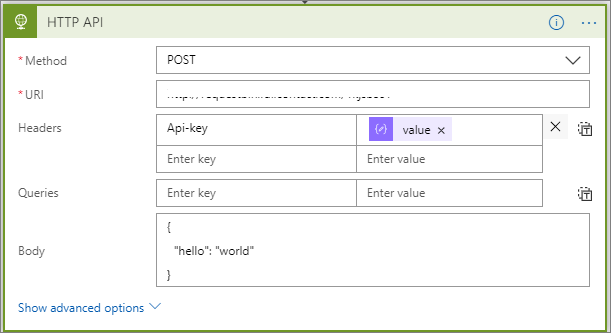
Since we have a typed key vault response message, we can use the output from the previous action (our HTTP API call). In this scenario, we need to provide an Api-key header and we will use our dynamic content value which contains the value of our secret.
Testing
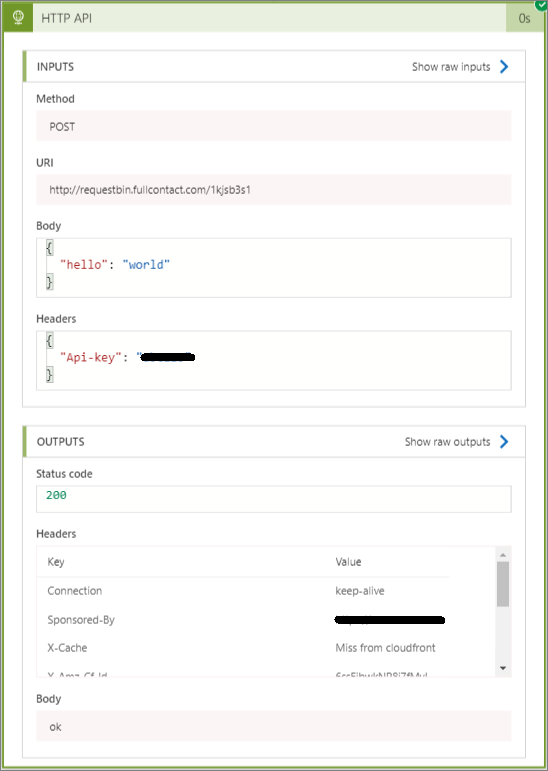
Let’s now run this logic app and see what the outputs end up being. As you can see in our call to the key vault, we are not providing a SAS token or any other type of authentication token. But, this is still a secure connection because our logic app is trustful.
After our call to the key vault, we can then see the input/outputs to our API call. As you can see our Api-key is being successfully passed to our API.
Run History
As you can see, values that are retrieved from Azure Key Vault do show up in the run history. For some scenarios, this may not be ideal or acceptable. As a result, you will want to be careful with the type of data you are including. But it is worth noting that you can restrict who has access to the logic app, and as a result, the run history through Identity and Access Management (IAM) permissions. So a decision needs to be made to understand the tradeoffs of using this approach. It is also important to note, that the intention of this post is to demonstrate the concepts behind managed identities. As more connectors adopt the managed identity, the strategy outlined in this post is transferable to other scenarios.
Continuous Integration/Continuous Deployment
You might be asking yourself – what about my continuous integration/continuous deployment processes? I can’t be manually touching each Logic app that I want to deploy. Fear not! Azure Resource Manager templates include support for system-assigned managed identities. When creating your template, include an element called identity and a type called SystemAssigned like the example below:
"identity": {
"type": "SystemAssigned"
}
When your logic app is provisioned, a managed identity will also be created and your workflow definition is updated to reflect the following:
"identity": {
"type": "SystemAssigned",
"principalId": "<principal-ID>",
"tenantId": "<Azure-AD-tenant-ID>"
}
Removing a Managed Identity
Earlier in this blog post, we discussed the two different types of managed identities: system and user assigned. To remove a system-assigned managed identity there are two options. The first being you can disable the managed identity from the Workflow settings experience in the logic apps settings. In addition, when you delete a logic app that has a managed identity, that system-assigned identity will also be deleted.
Limitations
Currently, you can only have 10 logic apps that have system-assigned managed identities. As a result, we need to plan accordingly to avoid this constraint. We also have the ability to architect nested workflows if we want to create reusable logic apps that leverage managed identities.
Conclusion
In this blog post, we explored a new managed identity capability that exists in Azure, which includes support for Azure Logic Apps. We also explored how we can use this form of authentication when connecting to Azure Key Vault. Connecting to Azure Key Vault was just for illustration purposes until additional connectors expose this authentication scheme. There are many connectors that would be a good fit for this type of functionality including:
- Service Bus
- Event Hubs
- Azure SQL Server
- Event Grid
- Cosmos DB
- Storage
- Graph API
- Machine Learning
- Cognitive Services