This blog will brief on how to encrypt a text file using Azure Logic App out of the box. In this blog, we will use keys from the Azure Key Vault to encrypt the file.
Consider a scenario in which I receive an e-mail with high importance along with the attachments. When it happens, I wish to back up those attachments carrying sensitive information in Azure Storage blobs in an encrypted format. As mentioned above I will use keys from Azure Key Vault to encrypt the files.
First, let us see a short introduction about the above-mentioned Azure services so that we can better understand it’s working.
Azure Logic App
Azure Logic App is a cloud service which is used to schedule, automate, and orchestrate tasks, business processes, and workflows when there is a need to integrate apps, data, systems, and services across enterprises or organizations. With businesses moving toward digitization, logic app help us to connect legacy, modern, and cutting-edge systems more easily and quickly by providing prebuilt APIs as Microsoft-managed connectors. We will use these connectors to automate our workflow.
Azure Key Vault
Azure Key Vault is a tool for securely storing and accessing secrets. A secret is anything that you want to tightly control access to, such as API keys, passwords, or certificates. A vault is a logical group of secrets. Azure Key Vault makes it easy to create and control the encryption keys used to encrypt your data. We will use those keys to encrypt the file.
Azure Storage Blob
Azure Blob storage is Microsoft’s object storage solution for the cloud. Blob storage is optimized for storing massive amounts of unstructured data. Unstructured data is data that doesn’t adhere to a data model or definition, such as text or binary data. We will store the encrypted data in the blob storage.
As we have seen the basics of these Azure services, let’s build an orchestration in Logic App that gets triggered when an email is received and encrypt the attachment from that mail and upload the encrypted data to the storage blob.
Azure Key Vault Configuration
Let us create an Azure Key Vault which will contain the key which will be used to encrypt the file. It is straight forward to create a Key Vault
Login into Azure Portal and click ‘Create a resource’ from the dashboard.
Search for ‘Key Vault’ and choose it from the result to create the Key Vault.
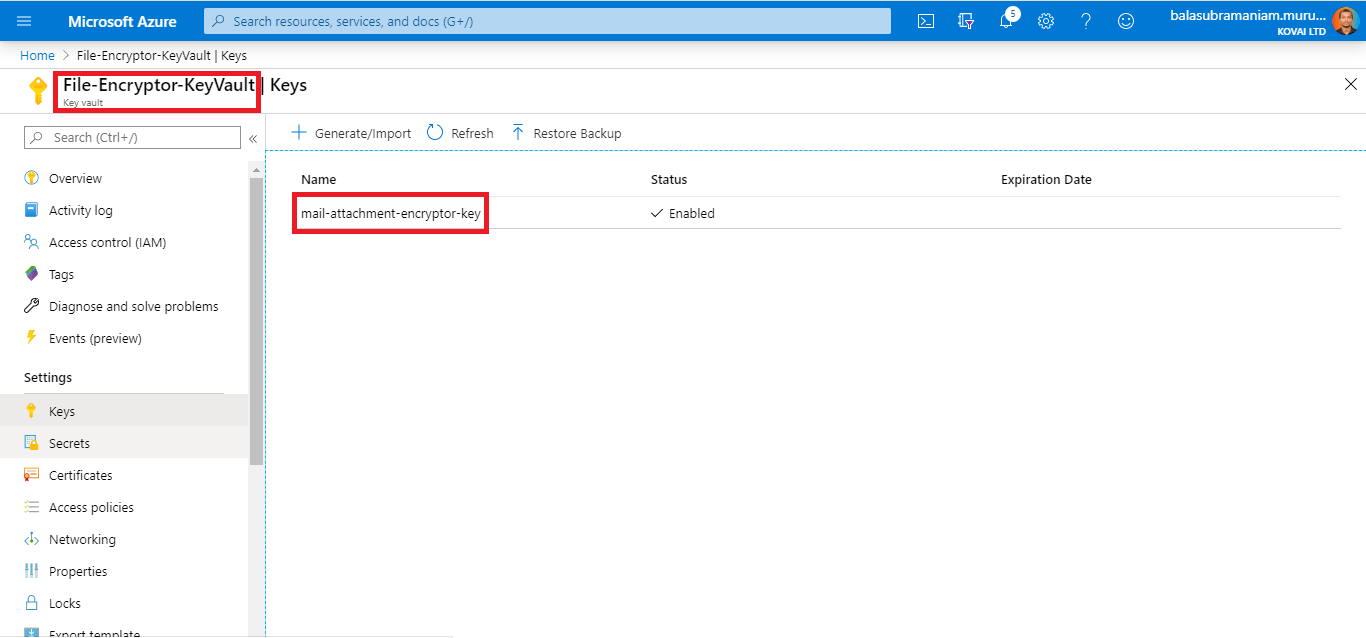
Once the Key Vault is created the next step is to generate the Keys, which can be done from the ‘Keys’ section in the left side menu. During the key generation, the activation and expiration of the key can be set, which can be used to better management of the generated key.
For this orchestration to encrypt the file, I have created a Key Vault named ‘File-Encryptor-KeyVault’ and generated a key named ‘mail-attachment-encryptor-key’.
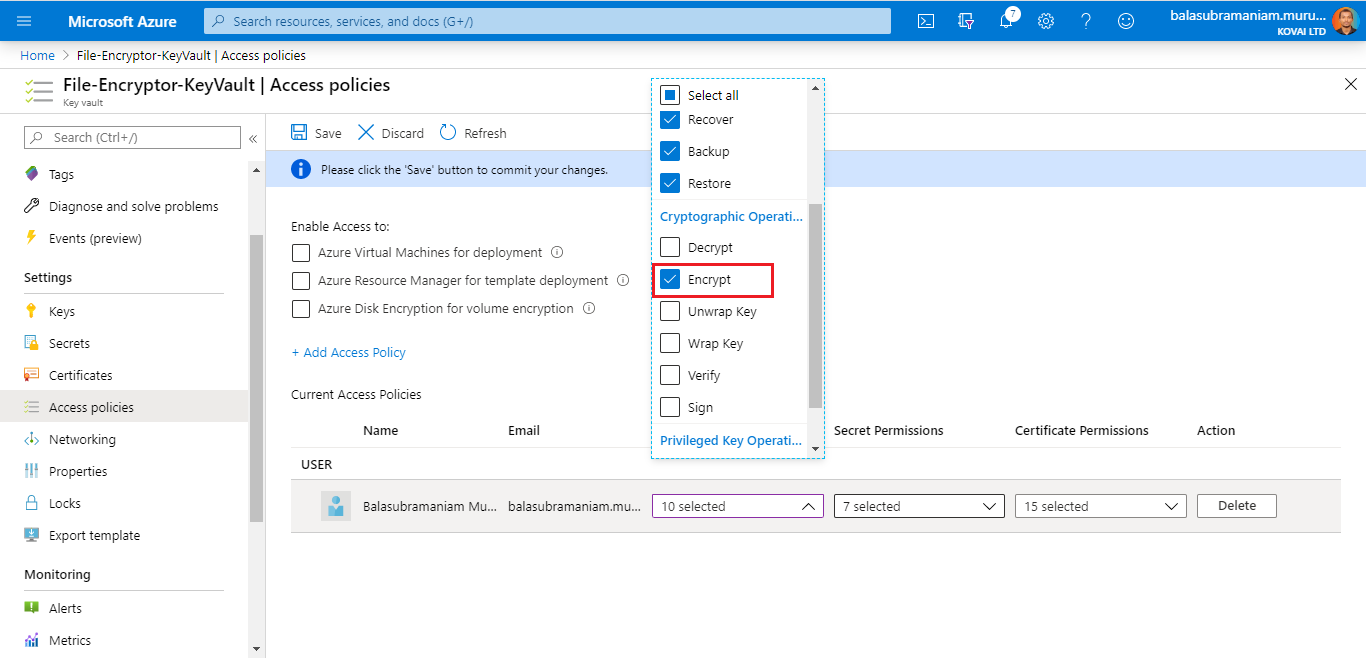
The generated key cannot be used as it is to encrypt the data, we must now configure a property to allow the generated key to perform encryption, which can be found in the ‘Access policies’ section of the Key Vault.
- Navigate to ‘Access policies’ in the left side menu of Key Vault.
- From the ‘Key Permissions’ column, from ‘Cryptographic Operations’ menu choose ‘Encrypt’.
- Save the configuration.
Note: To allow any Managed Identity to access the keys, ‘Add Access Policy’ option from this section can be used.
Now the generated key is ready to encrypt our data.
Azure Blob Storage Configuration
Now the next step is configuring the storage blob to store the encrypted data. As the blobs are stored in the Azure Storage Account, let’s create a Storage Account through the following simple steps:
- From the Azure Portal, click ‘Create a resource’ in the dashboard
- Search for ‘Storage Account’ and choose it from the result to create the Storage Account
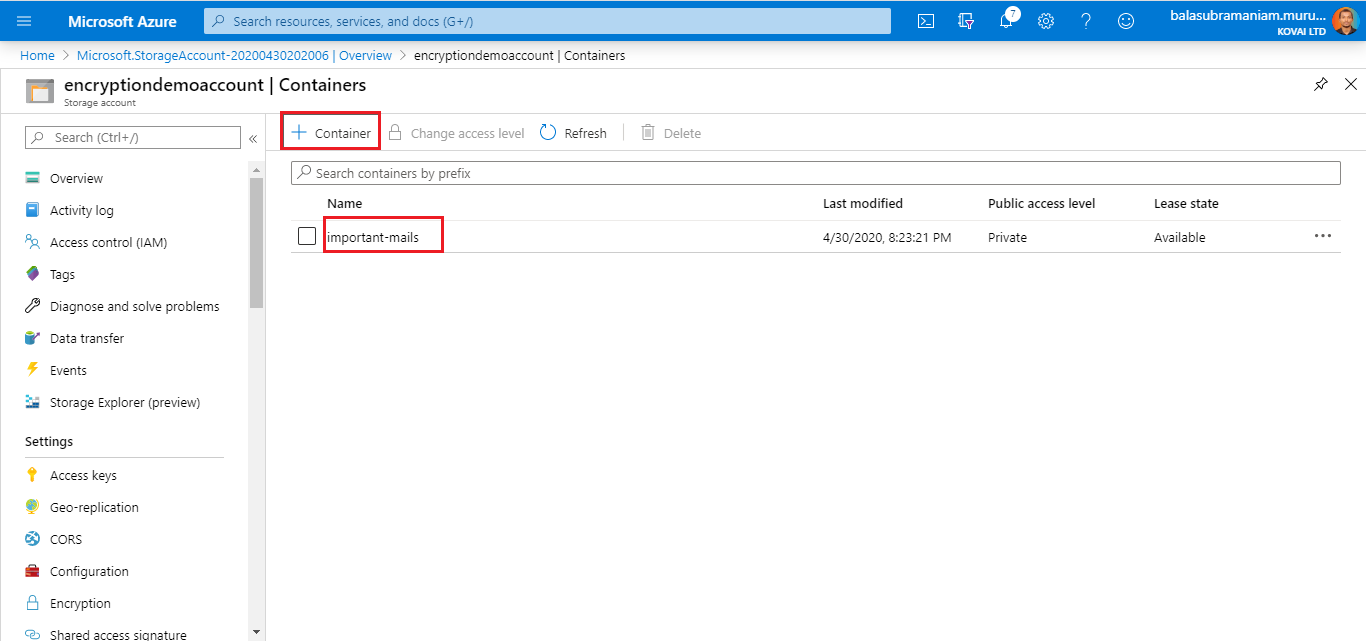
Once the Storage Account is created next step is to create a ‘Blob Container’ to store blobs. It can be done from the ‘Containers’ section on the left side menu. I have created a Storage Account named ‘encryptiondemoaccount’ and created a blob container named ‘important-mails’ to store the encrypted files as blobs.
Azure Logic App Configuration
As all the services and configuration for the mail attachment to be encrypted and stored are done, let us start building the orchestration. Create a Logic App and choose ‘Blank Logic App’.
Trigger Configuration
- Search for ‘Office 365 Outlook’ connector
- Choose the trigger named ‘When a new email arrives (V3)’
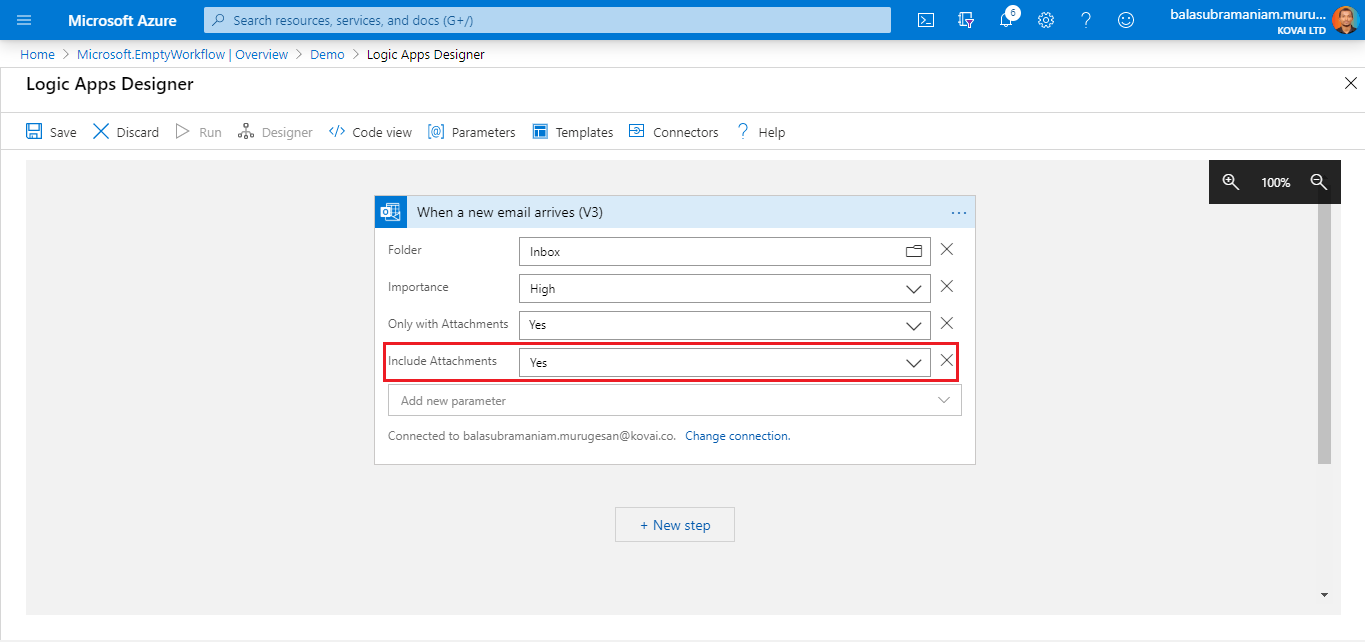
Configure the trigger with the following properties
- Set ‘Importance’ as ‘High’. If this value is not set to ‘High, all the mails will trigger this Logic App rather than the mails with high importance.
- Set ‘Only with Attachments’ as ‘Yes’. If this value is not set to ‘Yes, mails without attachment will also trigger the Logic App.
- Set ‘Include Attachments’ as ‘Yes’. If this value is not set to ‘Yes’, the attachments will not be available for the next connectors.
The next step is to configure an action to encrypt the attachment.
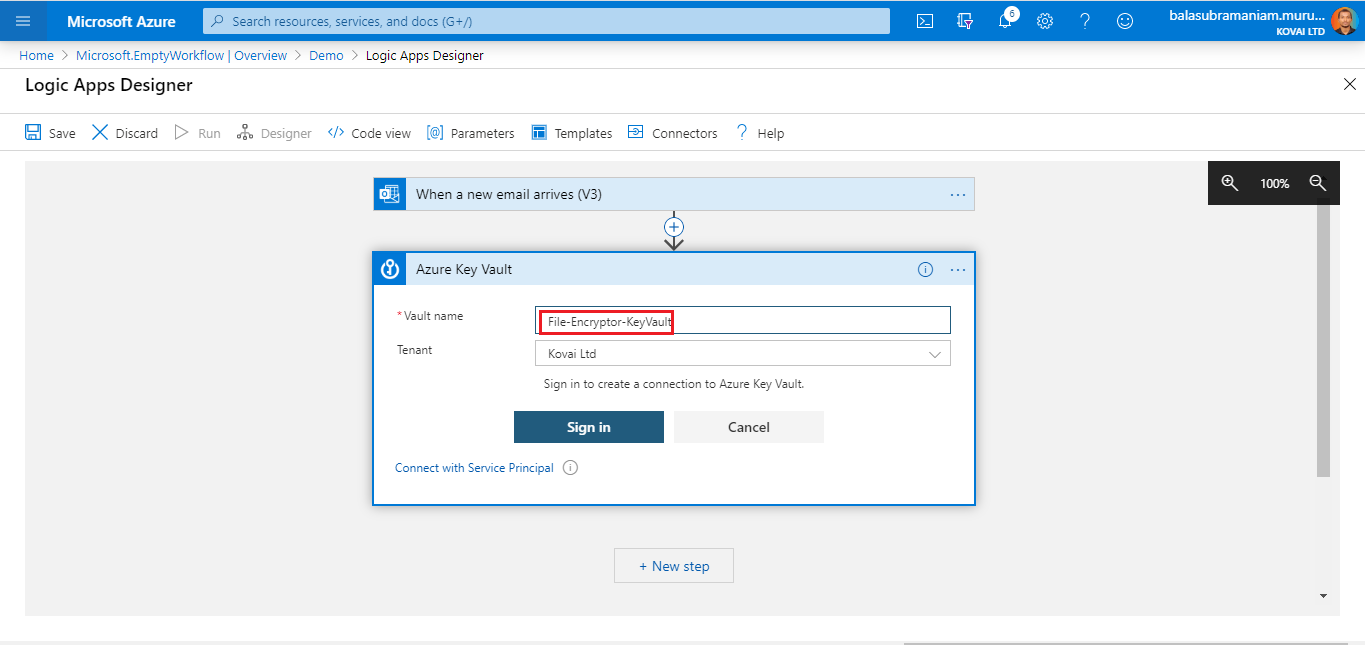
- Search for ‘Azure Key Vault’ connector.
- Choose the action named ‘Encrypt data with key’.
Authorize the Key Vault connector by providing the name of the Key Vault and the tenant in which the Key Vault is present. In our case, it is ‘File-Encryptor-KeyVault’.
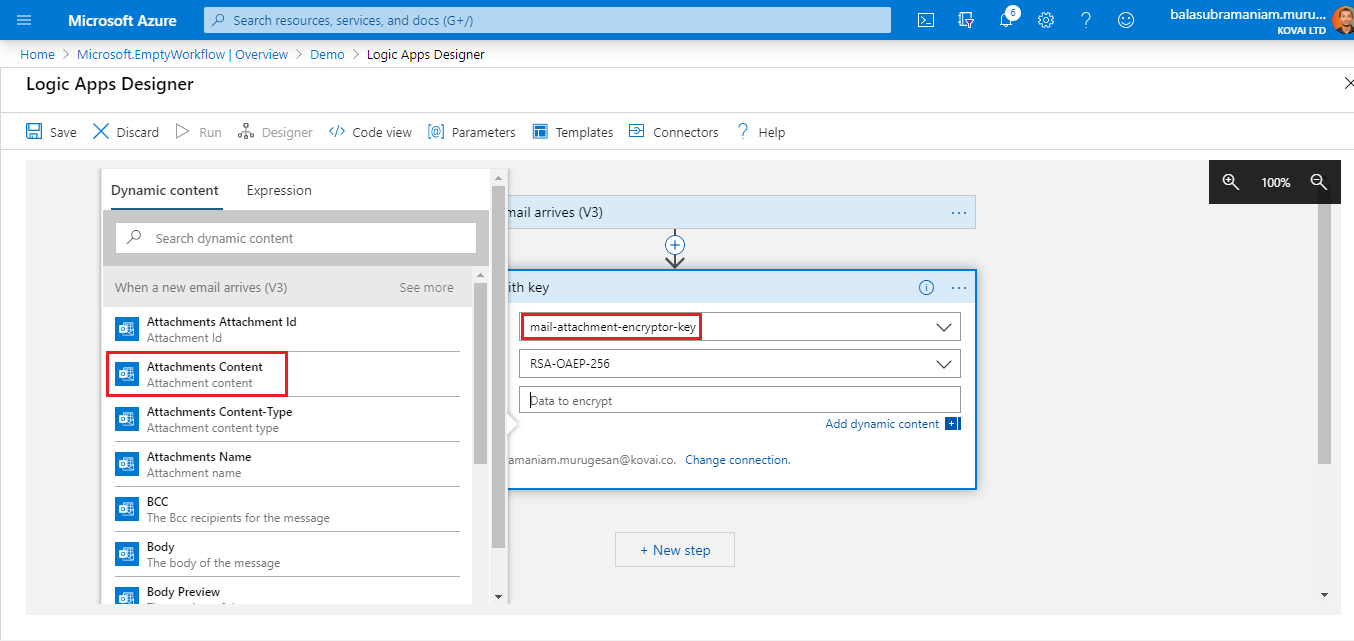
Configure the ‘Encrypt data with key’ action as follows
- Set ‘Name of the Key’ from the list of keys available in the KeyVault. In our case, it is ‘mail-attachment-encryptor-key’
- Set ‘Raw Data’ as ‘Attachments content’ from the dynamic content available.
The final step is to configure an action to upload the encrypted attachment to the blob storage.
- Search for ‘Azure Blob Storage’ connector.
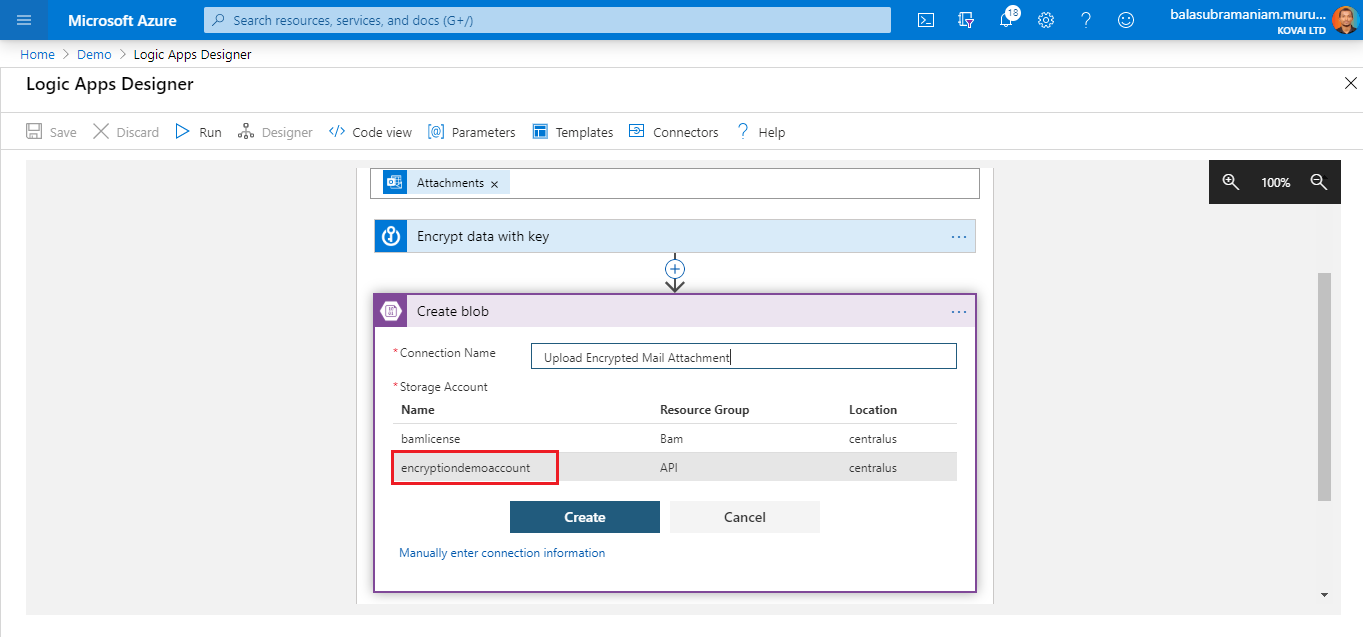
- Choose the action named ‘Create Blob’.
Authorize the Blob Storage connector by providing any ‘Connection Name’ and choosing the ‘Storage Account’ to which the blobs should be uploaded. In our case, the Storage Account name will be ‘encryptiondemoaccount’.
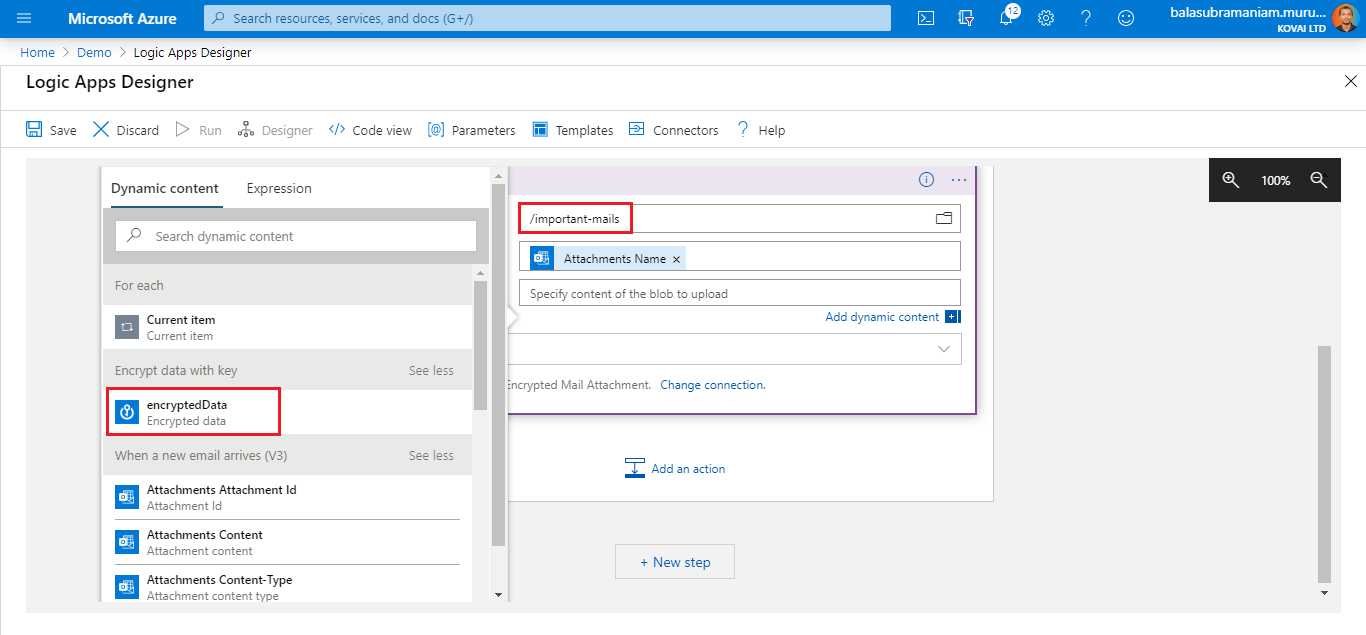
Configure the ‘Create Blob’ action as follows
- Set ‘Folder path’ from the list of blob containers available in the KeyVault. In our case, it is ‘important-mails’.
- Set ‘Blob name’ as ‘Attachments Name’ from the dynamic content available.
- Set ‘Blob content’ as ‘encryptedData’ from the dynamic content available.
The Logic App is completely configured. Now let us see its working by sending a mail with high importance along with an attachment.
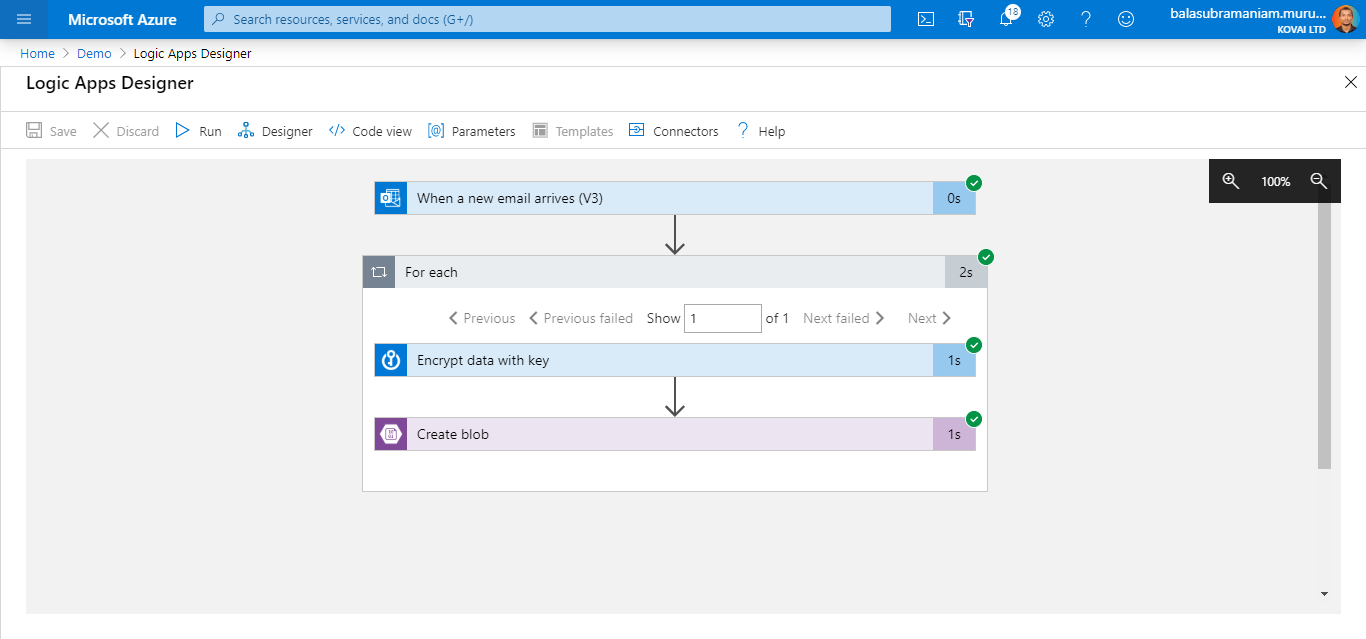
Working Logic App Orchestration
Now we can see that the Logic App is triggered, and all the actions are succeeded, when a mail with high importance is sent along with an attachment.
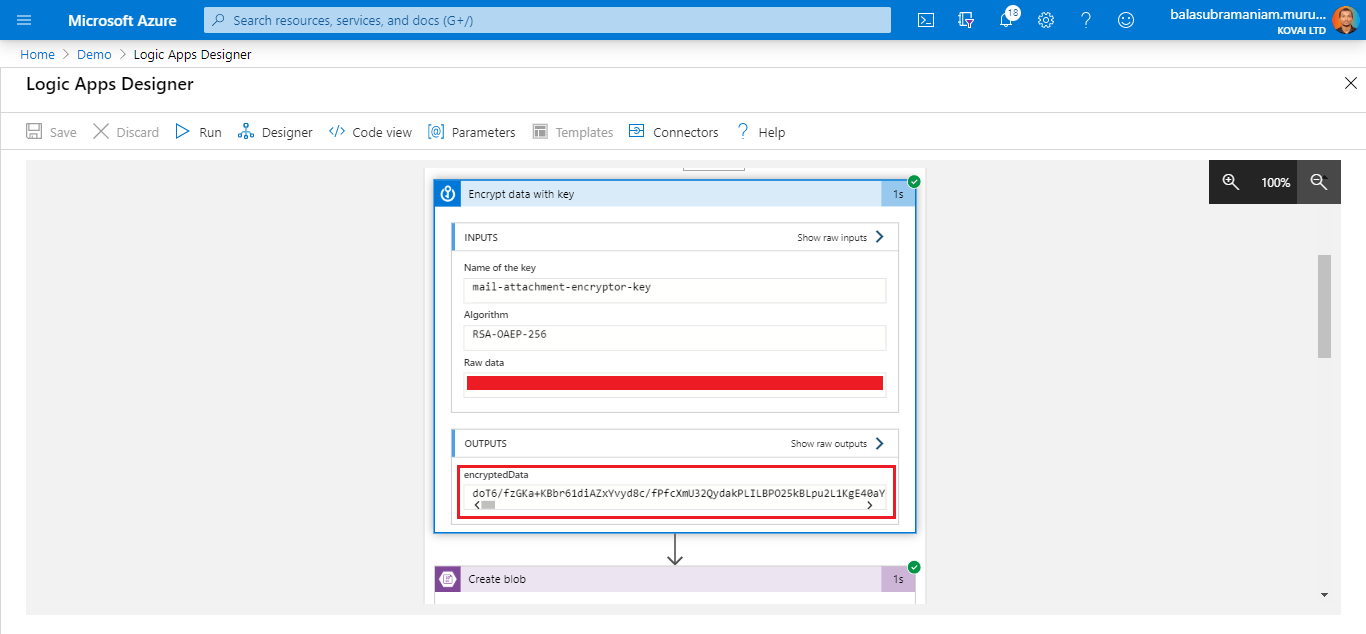
We can also see the raw(un-encrypted) data and encrypted data by inspecting the ‘Encrypt data with key’ action.
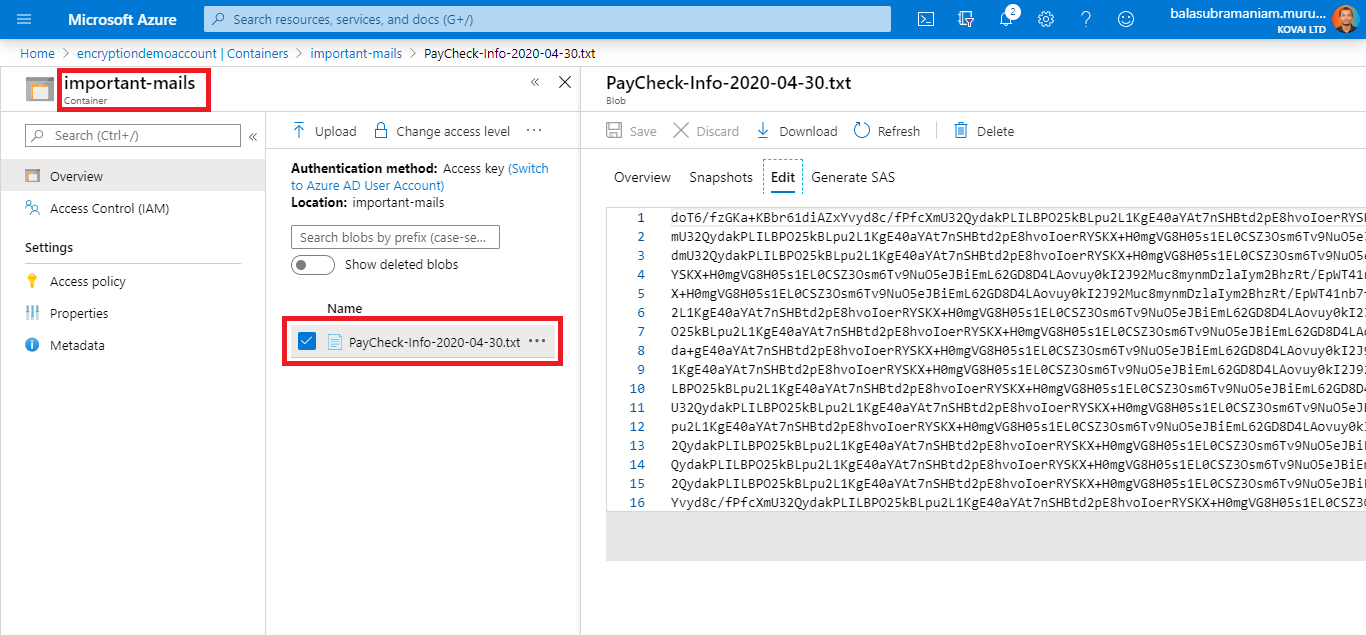
Now when we get into the ‘important-mails’ blob container in the ‘encryptiondemoaccount’ Storage Account, we can see a blob with the mail attachment’s name. We can also see the content of the blob is encrypted.
Strengthen your Azure Logic Apps monitoring and get powerful toolsets, actionable insights to troubleshoot issues with the help of Turbo360.